Ever felt your sketches looked too…flat? Dive into our latest guide on perspective drawing and discover how to breathe life into your doodles. No more flat landscapes or wonky furniture – just pure, captivating artistry that’ll make everyone do a double-take!
Discovering Perspective Drawing
Why Learn Perspective Drawing?
Have you ever marveled at how artists can transform a flat canvas into a scene that feels as deep and as real as the world around us? That magic is all thanks to perspective drawing! Learning perspective drawing is your key to unlocking an incredible world where your sketches come to life, offering a sense of depth and realism.
Whether you’re aiming to sketch a bustling cityscape, a serene landscape, or the cozy corner of a room, perspective drawing allows you to depict spatial depth like a pro. It’s a technique that not only enhances your doodling and sketching skills but also opens doors to more advanced artistic endeavors like figure drawing and landscape drawing.
Moreover, if you’re interested in pursuing fields like architecture, interior design, or even game design, perspective drawing is an indispensable skill. It helps you visualize and present your ideas clearly, showcasing the spatial relationships and dimensions of your creations effectively.
The Basics You Should Know
Before you dive into creating your first masterpiece, it’s important to grasp the basics of perspective drawing. Perspective drawing is a technique used to represent three-dimensional objects on a two-dimensional plane accurately, all while maintaining correct spatial relationships and proportions (Clip Studio Tips).
There are three main types of perspective drawing:
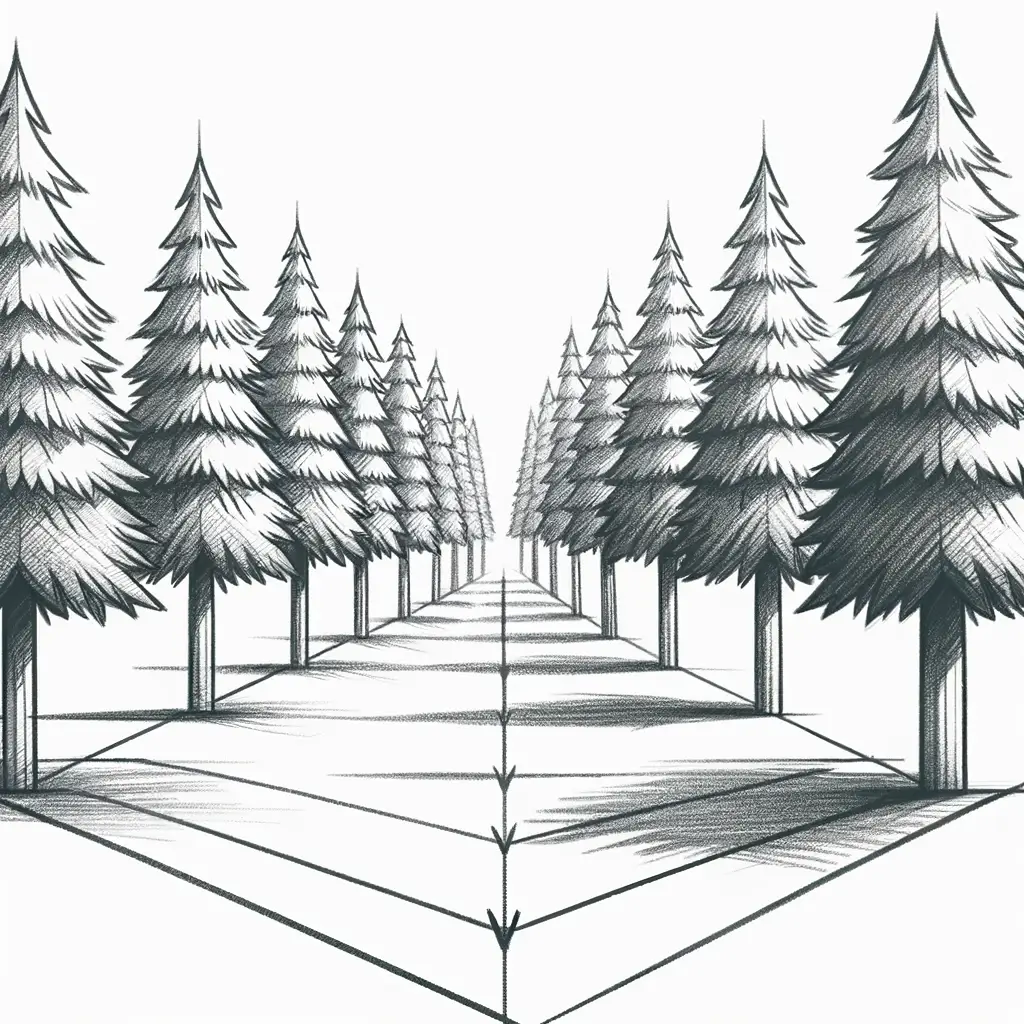
- One-Point Perspective: Uses a single vanishing point to draw objects, typically for scenes like roads or hallways stretching into the distance.
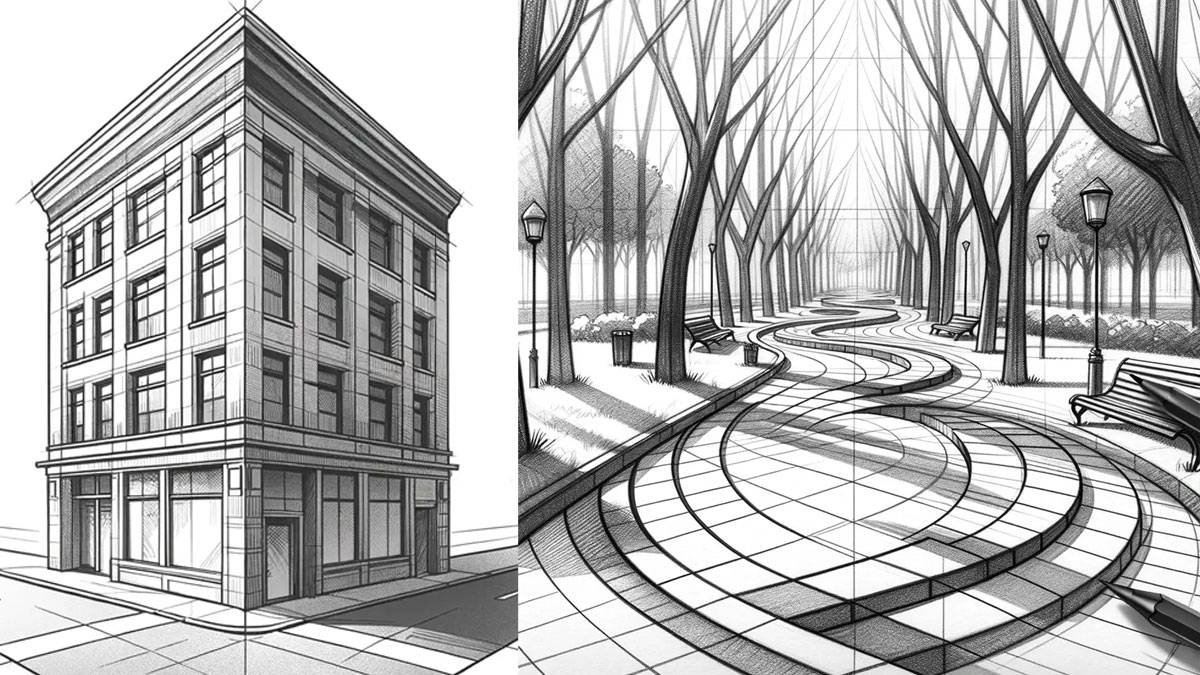
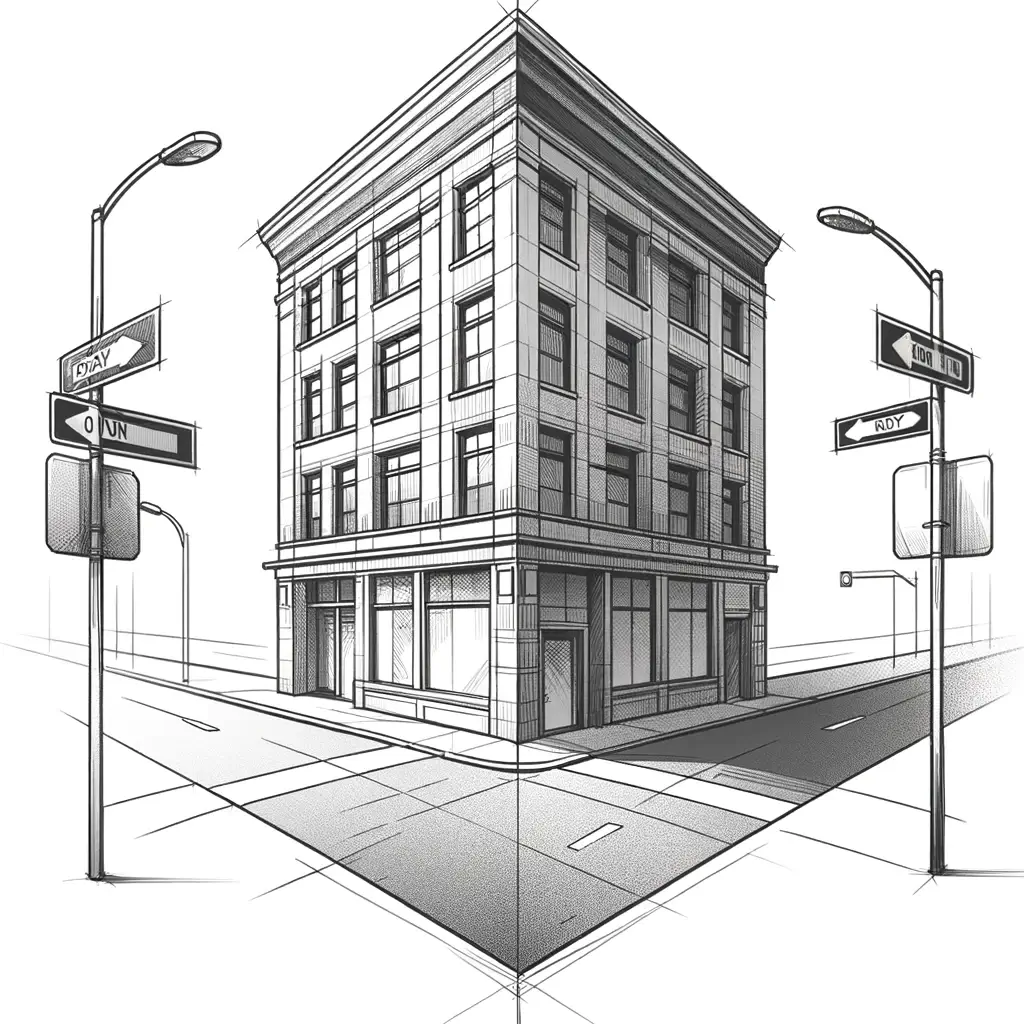
- Two-Point Perspective: Utilizes two vanishing points for drawing objects at an angle, such as a corner of a building.
- Three-Point Perspective: Adds a third vanishing point, either above or below the horizon line, to depict a view looking up at skyscrapers or down from a high vantage point.
The fundamentals of perspective drawing include understanding the horizon line, vanishing points, and the concept of the picture plane. The horizon line represents your eye level and is the anchor for all vanishing points. Vanishing points are where parallel lines appear to converge and are key to creating the illusion of depth (Northern Architecture).
As you start practicing, remember to refer to our guides on how to draw and pencil drawing for valuable tips and techniques. Embrace the principles of overlapping, size variation, and atmospheric perspective to add even more realism to your drawings.
Now that you’re equipped with the essentials, you’re ready to move from flat sketches to fabulous works of art. Grab your tools, and let’s add some perspective to your passion for drawing!
Starting with One-Point Perspective
Get ready to transform your flat sketches into dynamic drawings with the magic of perspective drawing. It’s a game-changer for anyone who loves to draw, especially if you want to create realistic interiors or cityscapes with depth and dimension. Let’s dive into the basics of one-point perspective and create your very first scene that pops off the page!
Understanding Vanishing Points
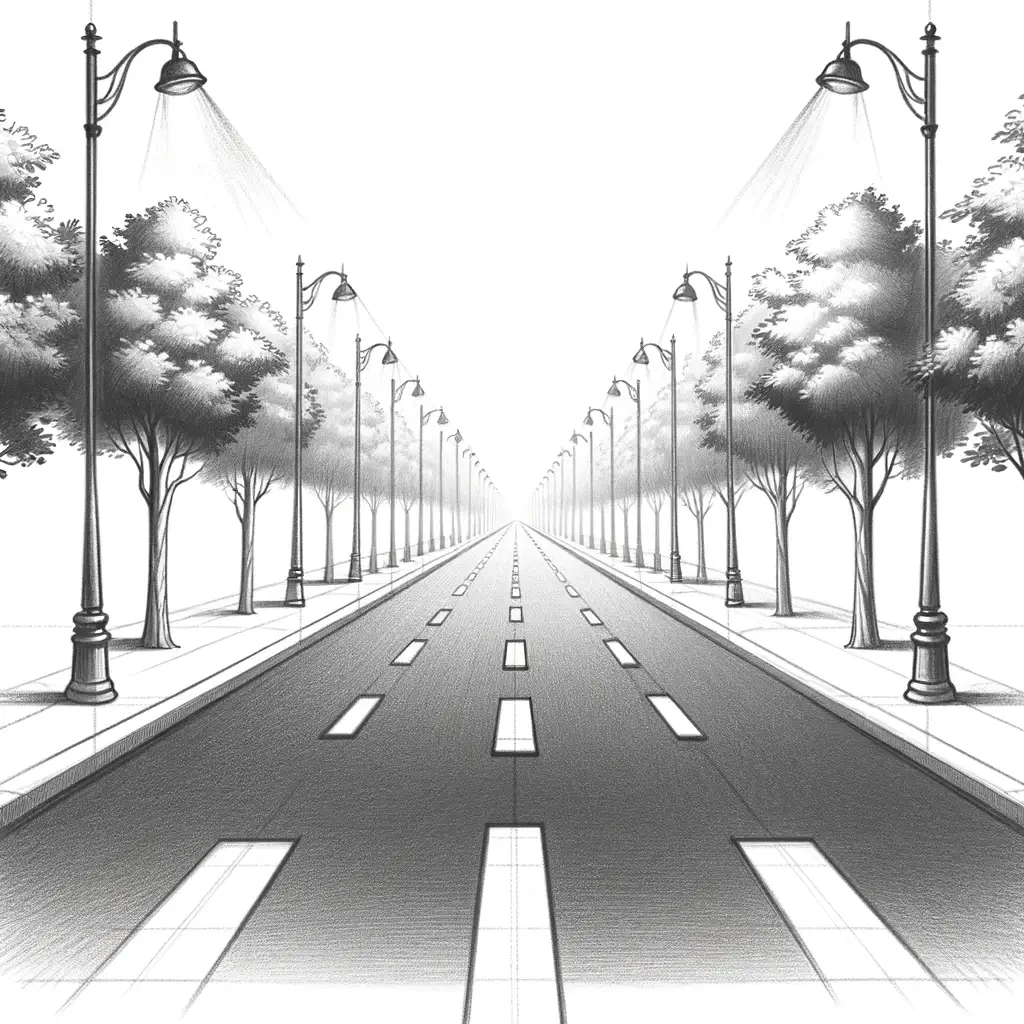
In one-point perspective, the vanishing point is the heart of your drawing—it’s the spot on the horizon where parallel lines seem to meet. Imagine you’re standing on a straight road that stretches into the distance. The road narrows as it goes further away, and the edges seem to converge at a point on the horizon. That’s your vanishing point, the point at which receding parallel lines diminish (Art Web).
When you’re drawing a scene facing directly towards you, like a road or a hallway, you’ll use this single vanishing point to guide where your lines end. Vertical lines will stay vertical, horizontal lines will remain horizontal, and all other lines, called orthogonals, will point toward the vanishing point, giving the illusion of depth (Northern Architecture).
Drawing Your First Scene
Grab your pencils, because it’s time to create your first one-point perspective drawing! Start by drawing your horizon line across the page; this represents your eye level. Now, pick a spot on this line for your vanishing point.
Next, you’ll draw the orthogonal lines. These are the lines that will travel towards the vanishing point. If you’re drawing a road, these would be the edges. For a hallway or a room, these could be the lines defining the walls, ceiling, and floor. Remember, all these lines should meet at the vanishing point.
Then, add the vertical lines for structures like buildings or doorframes—these lines stay parallel to the edges of your paper. The combination of these parallel vertical lines and converging orthogonal lines will start to form a three-dimensional space on your two-dimensional surface.
Finally, refine your drawing by adding details—windows, doors, or other elements that bring your scene to life. Keep in mind that the further away these features are, the closer they will be to the vanishing point, and the smaller they will appear. This is the essence of creating a believable space.
As you practice this technique, you’ll begin to see the world around you differently. One-point perspective is not just for pencil drawing or landscape drawing, it’s a fundamental skill that can enhance your doodling, line drawing, and even complex compositions like figure drawing and gesture drawing. So keep exploring, keep sketching, and soon, your flat drawings will become fabulous works of art with depth and realism that draw the viewer in.
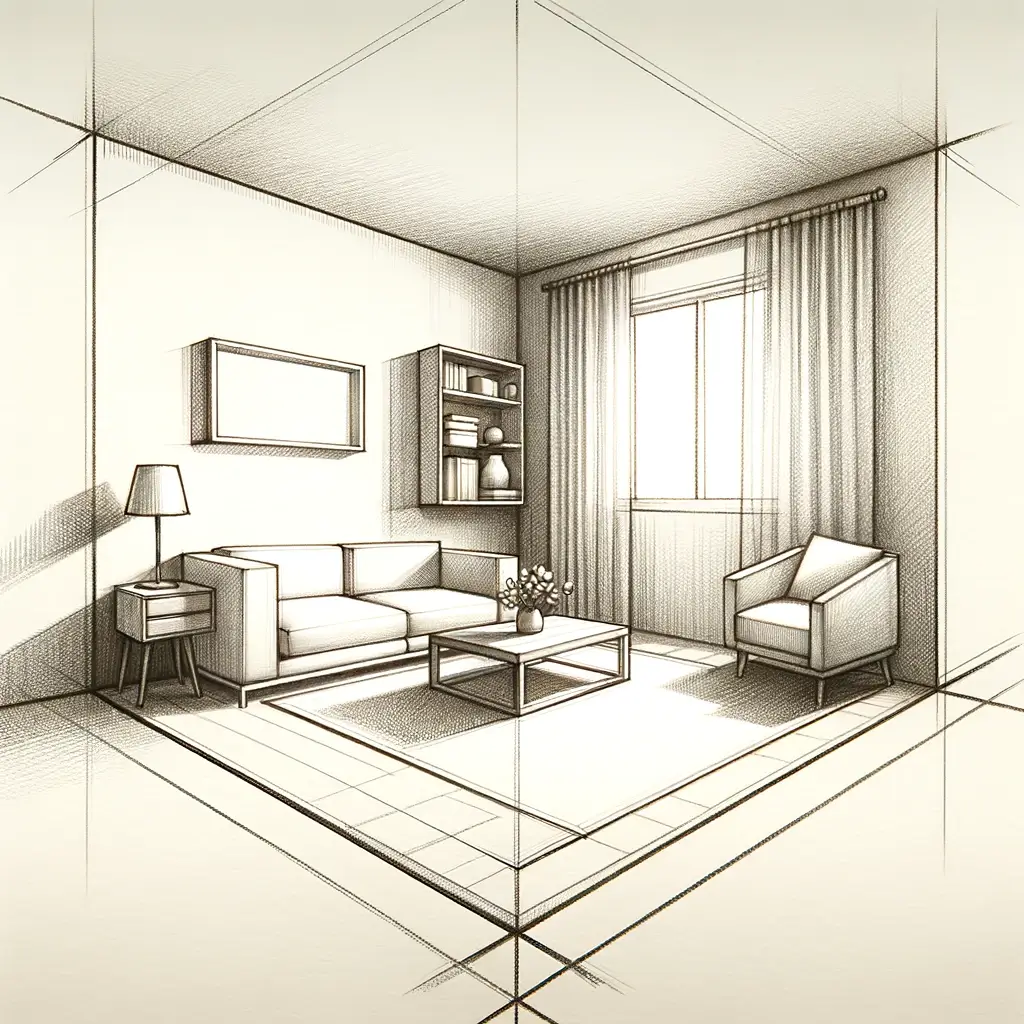
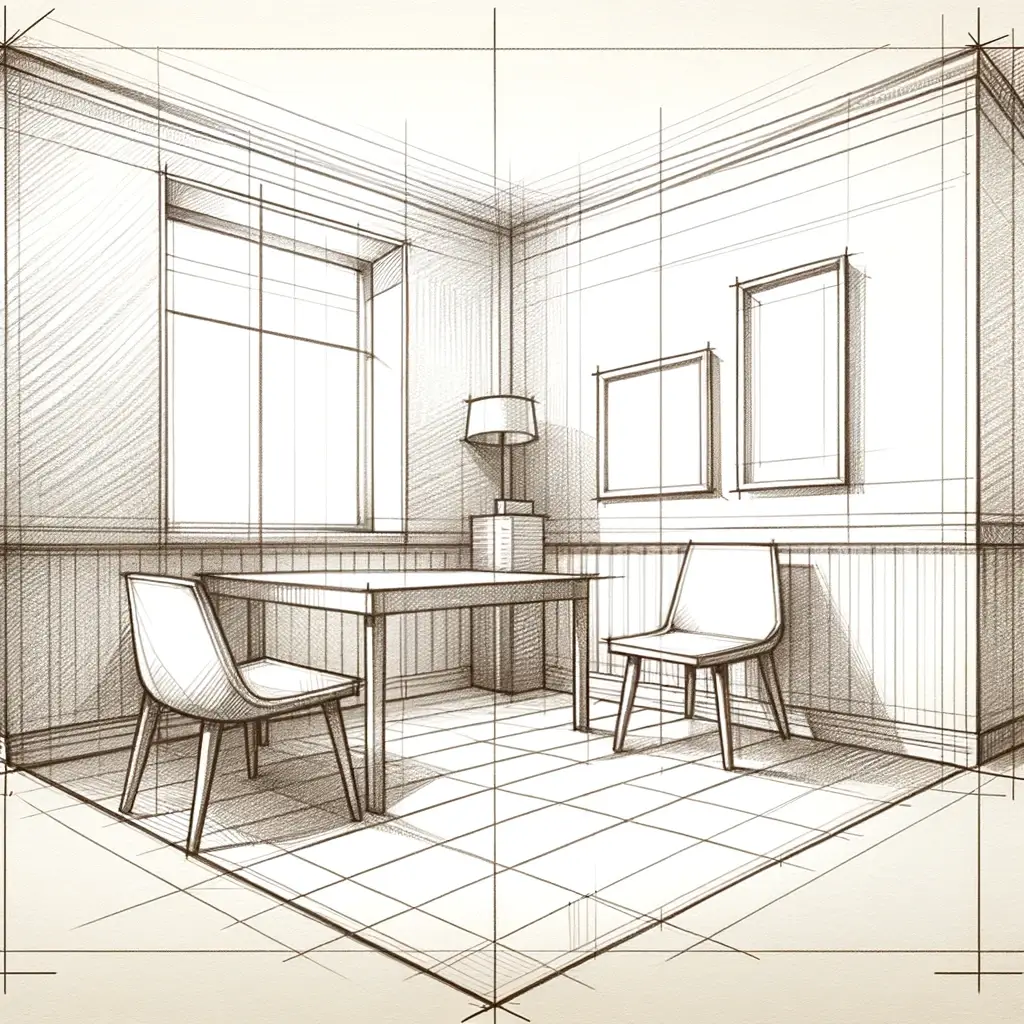
Advancing to Two-Point Perspective
You’ve mastered the art of one-point perspective and are ready to add even more dimension to your sketches. Two-point perspective is your gateway to creating dynamic, realistic drawings that pop off the page. Get excited to see how this technique can transform your art!
The Angle Makes a Difference
When you start experimenting with two-point perspective, the angle at which you view your subject makes all the difference. Unlike one-point perspective, which focuses on front-facing objects, two-point perspective is perfect when you’re looking at the corner of a building or any object at an angle. Here, you’ll use two vanishing points placed on the horizon line, and these points will guide you in shaping your drawing to mimic how your eyes perceive depth and distance.
Remember, the placement of your vanishing points can significantly impact the look and feel of your drawing. If you place them too close together, your drawing will appear distorted, but if you set them wide apart, you’ll capture a more realistic and visually appealing depiction of your subject. So, grab your ruler and start exploring the angles that bring your sketching to life!
Dynamic Sketches with Two Points
Ready to create something spectacular? Two-point perspective allows your drawings to convey the natural depth and three-dimensionality that you see in the world around you. As you draw, maintain the verticality of your vertical lines, but let your horizontal lines travel towards the two vanishing points on your horizon line. This method is what gives your drawings that incredible sense of reality.
| Step | Instruction | Tip |
|---|---|---|
| 1 | Sketch the horizon line and place two vanishing points. | Keep them wide for a natural perspective. |
| 2 | Draw the vertical line for the corner of your object. | This line remains perfectly vertical. |
| 3 | Connect the top and bottom of this line to both vanishing points. | Ensure lines are straight and converge correctly. |
| 4 | Decide where the sides of your object end and draw vertical lines. | These lines are parallel to your original vertical line. |
| 5 | Erase unnecessary lines and refine your sketch. | Clean lines will enhance the sense of depth. |
(Art Web](https://blog.artweb.com/how-to/point-perspective-art-techniques/)
Whether you’re an aspiring architect, a passionate doodler, or someone who enjoys the meditative act of pencil drawing, two-point perspective is a tool that opens up a world of possibilities. It’s a technique that closely resembles the natural viewing angle of the human eye, making it the most commonly used perspective technique for drawing (Clip Studio Tips).
So, why not take your landscape drawing to new heights, or give your figure drawing a more grounded presence? With two-point perspective, you can inject life into your cityscapes, create depth in your interior designs, or even add that extra punch to your gesture drawing. And remember, the best part about learning a new art technique is the journey, so enjoy every stroke, every line, and every new discovery as you continue to grow as an artist.
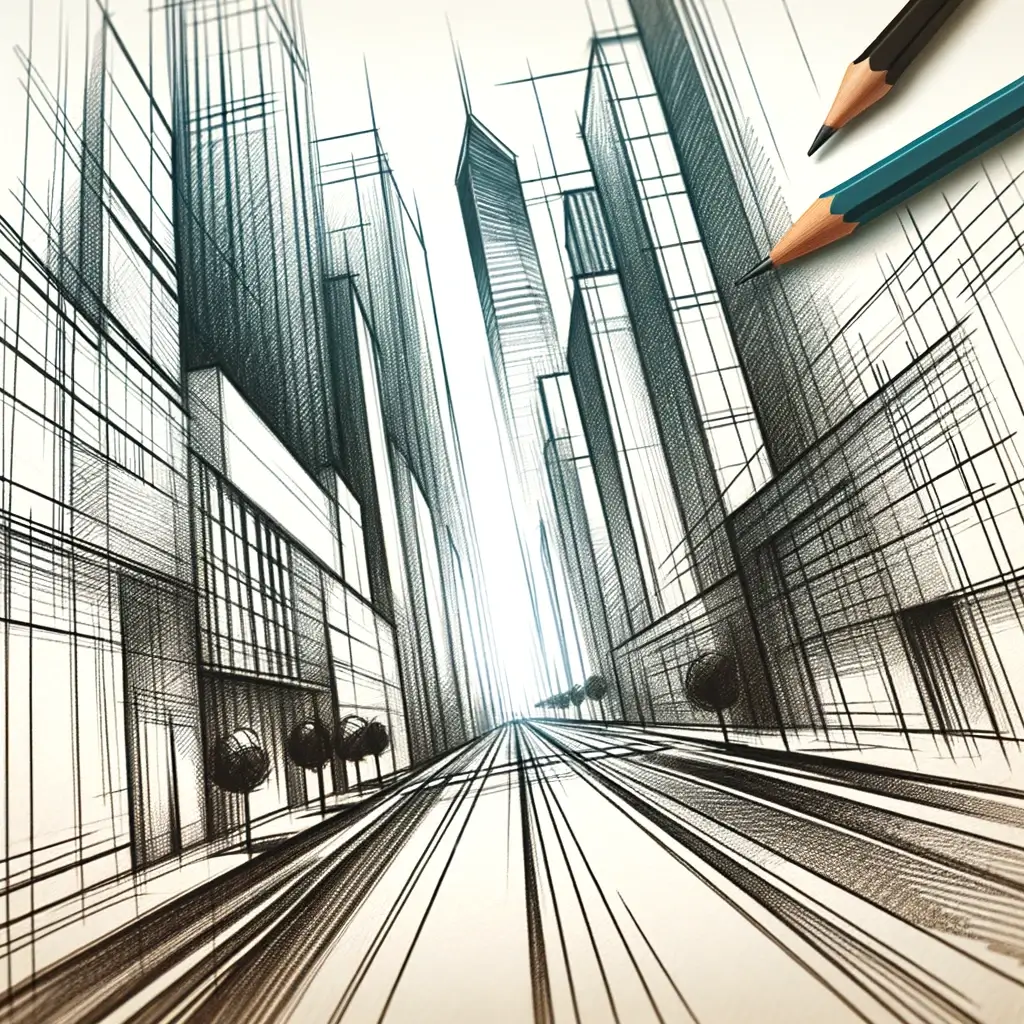
Exploring Three-Point Perspective
Taking your drawings from simple to spectacular, three-point perspective is the thrilling leap you get to make in the world of perspective drawing. This technique adds depth and drama to your artwork like no other, inviting your viewers into a world of exaggerated dimensions and dynamic compositions. Let’s dive into the realm of three-point perspective and discover how to amplify the visual impact of your drawings!
Adding Drama to Your Drawings
Imagine looking up at a towering skyscraper or gazing down into a dizzying canyon; these scenes stir emotions of awe and grandeur. That’s exactly the kind of drama you can create in your drawings with three-point perspective. By introducing a third vanishing point, either above or below the horizon line, you can depict objects from a high or low viewpoint, adding a sense of majesty or depth to your compositions. This technique is perfect for showcasing the imposing nature of an object or a sweeping sense of vertigo.
Three-point perspective allows you to play with the angle and scale of objects, making them appear to stretch towards the sky or swoop towards the ground. It gives life to your sketching efforts, transforming them from flat renderings to living, breathing scenes that pull the viewer into the page.
| Element | Role in Three-Point Perspective |
|---|---|
| Third Vanishing Point | Adds height or depth to the scene |
| Horizon Line | Establishes the viewer’s eye level |
| Converging Lines | Lead the viewer’s eye and create dimension |
(Art Web)[https://blog.artweb.com/how-to/point-perspective-art-techniques/]
High and Low Viewpoints
The magic of three-point perspective is most evident when you position the third vanishing point either high above or far below the horizon line to simulate a bird’s-eye or worm’s-eye view, respectively. A high viewpoint can make your viewer feel as though they’re soaring above the cityscape, looking down upon a scene from the clouds. Conversely, a low viewpoint can ground your audience, making them feel small as they look up at the towering elements of your drawing.
When employing three-point perspective, consider the following:
- High Viewpoint: Place the third vanishing point above the horizon line to create a sense of height and dominance. This is ideal for landscape drawing where you want to capture the sprawling vastness of a scene from above.
- Low Viewpoint: Situate the third vanishing point below the horizon line to exaggerate the depth and scale from a lower angle. Use this for drawing buildings that seem to pierce the sky or for figure drawing where the subject towers over the viewer.
Mastering the use of high and low viewpoints in three-point perspective will make your artwork not just seen but experienced. It’s a powerful tool in your artistic arsenal that, when combined with line drawing techniques like cross hatching, brings a robust sense of realism to your creations.
Unlock the potential of three-point perspective and watch as your flat sketches rise to new heights of fabulous. With practice, you’ll soon be creating pieces that not only captivate your audience but also tell stories from perspectives they’ve never imagined. Ready to learn more? Check out our guide on how to draw for all the tips and tricks you’ll need to become a perspective pro!
Enhancing Realism in Drawings
Transport your flat sketches into the realm of the breathtakingly real! By mastering a few techniques in perspective drawing, you can imbue your artwork with life-like depth and dimension that leaps off the page.
Atmospheric Perspective Magic
Picture this: you’re gazing at a landscape where distant mountains fade into a soft mist, and the far-off trees merge with the sky’s hue. This enchanting effect is known as atmospheric perspective, and it’s not just for Mother Nature. You can apply the same principle to your drawings to simulate the effects of distance and air on objects as they recede into the background. Objects become lighter, duller, and take on a bluish tint the further they are from the viewer.
Atmospheric perspective is your secret ingredient for depth. With this technique, you can transform a simple pencil drawing into a captivating scene that invites the viewer into your artwork’s world. Here’s a tip: as elements in your drawing move back in space, gradually decrease their contrast and saturation (Art Web). It’s like magic on paper!
Shade and Shadow for Depth
When you begin shading your work, you’re not just darkening areas; you’re sculpting form and space. The strategic placement of shade and shadow, following the rules of perspective, breathes life into your subjects. It’s all about understanding how light interacts with objects and how it influences what we perceive.
Shadows aren’t just black smudges. They’re nuanced, with varying degrees of darkness that tell the story of how objects exist in space. Remember, shadows follow perspective too. They extend and fade in a way that’s consistent with your vanishing points and light sources. For example, as a rule, the closer the shadow is to the object casting it, the darker and sharper it will be. As it stretches away, it becomes lighter and more diffuse (Northern Architecture).
| Element | Closer to Object | Further from Object |
|---|---|---|
| Shadow Darkness | Darker | Lighter |
| Shadow Sharpness | Sharper | More Diffuse |
To master this, start with simple shapes in your how to draw exercises, like boxes and cylinders. Practice casting their shadows on various surfaces and under different light conditions. You’ll soon find that you’re not just drawing lines and forms; you’re creating a tangible world on a once blank canvas.
By incorporating atmospheric perspective and understanding shade and shadow, you’re well on your way to transforming your doodles and sketches from flat to fabulous. Keep practicing these techniques, and don’t be afraid to experiment with different textures and gradients, such as cross hatching, to add even more depth to your figure drawing or landscape drawing. The journey from learning perspective drawing to creating masterpieces is an exciting one, filled with endless possibilities and discoveries. So grab your tools, and let’s add some drama to those drawings!
Tools for Perfecting Perspective
Perfecting your perspective drawing skills can truly bring your artwork to life, and there are both traditional and digital tools that can help you achieve precision and unleash your creativity. Whether you’re doodling for fun or seriously working on a landscape drawing, these tools are your allies in making your drawings pop with realism.
Traditional Tools for Precision
When it comes to traditional drawing, precision is key, and there are several tools designed to help you achieve just that:
- Ruler and Straightedge: Essential for drawing straight lines, especially when establishing horizon lines or vanishing points.
- Pencils: A range of pencils from hard to soft (2H to 6B) allows you to sketch lightly and then darken your lines as needed.
- Erasers: Needed for correcting lines and adjusting vanishing points. Kneaded erasers are particularly useful for lifting graphite without damaging your paper.
- Protractor: Ideal for measuring precise angles, especially when working with two-point or three-point perspective.
- Drawing Compass: For perfect circles and arcs that maintain perspective.
- Triangle and T-Square: For ensuring vertical and diagonal lines are at the correct angle in relation to the horizon line.
Don’t forget to explore techniques like cross hatching and line drawing to add texture and depth to your work. Even if you’re just starting with how to draw, these tools are foundational for creating artwork that stands out.
Digital Tools for Creativity
If you’re ready to take your drawings from the sketchpad to the screen, digital tools offer a world of possibilities:
- Graphic Tablets: Devices like Wacom tablets allow you to draw directly into a computer with a stylus, giving you the feel of pencil on paper with all the benefits of digital.
- CAD Software: Computer-Aided Design (CAD) software has revolutionized drawing with precision and efficiency. As noted by LinkedIn, CAD provides architects and artists with tools to create detailed 3D models and visualizations of their projects.
- Painting Software: Programs like Adobe Photoshop and Clip Studio Paint offer perspective tools that help you set up grids and lines that follow your chosen vanishing points.
- 3D Modeling Programs: Software like SketchUp or Blender can help you create a 3D model of your scene, which you can then use as a reference for your perspective drawings.
| Tool Type | Examples |
|---|---|
| Graphic Tablets | Wacom, Huion |
| CAD Software | AutoCAD, SketchUp |
| Painting Software | Adobe Photoshop, Clip Studio Paint |
| 3D Modeling Programs | Blender, Maya |
Embracing these digital tools not only enhances your ability to create complex drawings but also opens the door to sharing your work with a wider audience. Whether you’re working on figure drawing, gesture drawing, or any other form of art, digital tools can elevate your perspective drawing to new heights.
Remember, using these tools takes practice, but they can significantly improve the accuracy and look of your perspective drawings. Take the time to learn and master them, and watch your flat sketches transform into fabulous, three-dimensional masterpieces.
Applying Perspective to Everyday Art
Incorporating perspective drawing into your everyday art projects can transform flat images into dynamic, realistic masterpieces. Whether you’re redesigning your living space or capturing the beauty of the great outdoors, understanding perspective will take your artistic abilities to new heights.
Perspective in Interior Design
When you’re venturing into the world of interior design, perspective drawing becomes your secret weapon in visualizing and communicating your ideas. Imagine accurately constructing your dream living room layout or kitchen renovation before moving a single piece of furniture. With perspective drawing, you can!
For interior designers, perspective drawing is about precision and presentation. It’s not just about observation; it’s about planning and executing design concepts. Whether you’re sketching by hand or using advanced 3D software, perspective drawing is a fundamental skill (Liz Steel). It allows you to accurately depict how different elements within a space relate to each other, ensuring cohesion and aesthetic appeal.
Here’s a quick glance at how to set up your drawings:
| Step | Description |
|---|---|
| 1 | Establish the horizon line and vanishing points |
| 2 | Draw construction lines to outline the room’s shape |
| 3 | Add furniture and decor in perspective |
| 4 | Apply shading and texture for realism |
As you progress from manual drawings to 3D models, your understanding of perspective ensures that every detail, no matter how minor, contributes to the overall design. Manual setup with traditional drawing tools can involve extensive construction lines, but the outcome is a clear and precise depiction of your envisioned space. If you’re looking to hone these essential skills, consider exploring workshops that transition from the basics to more advanced techniques (Liz Steel). And don’t forget, if you’re new to these concepts, our how to draw guide is a great starting point.
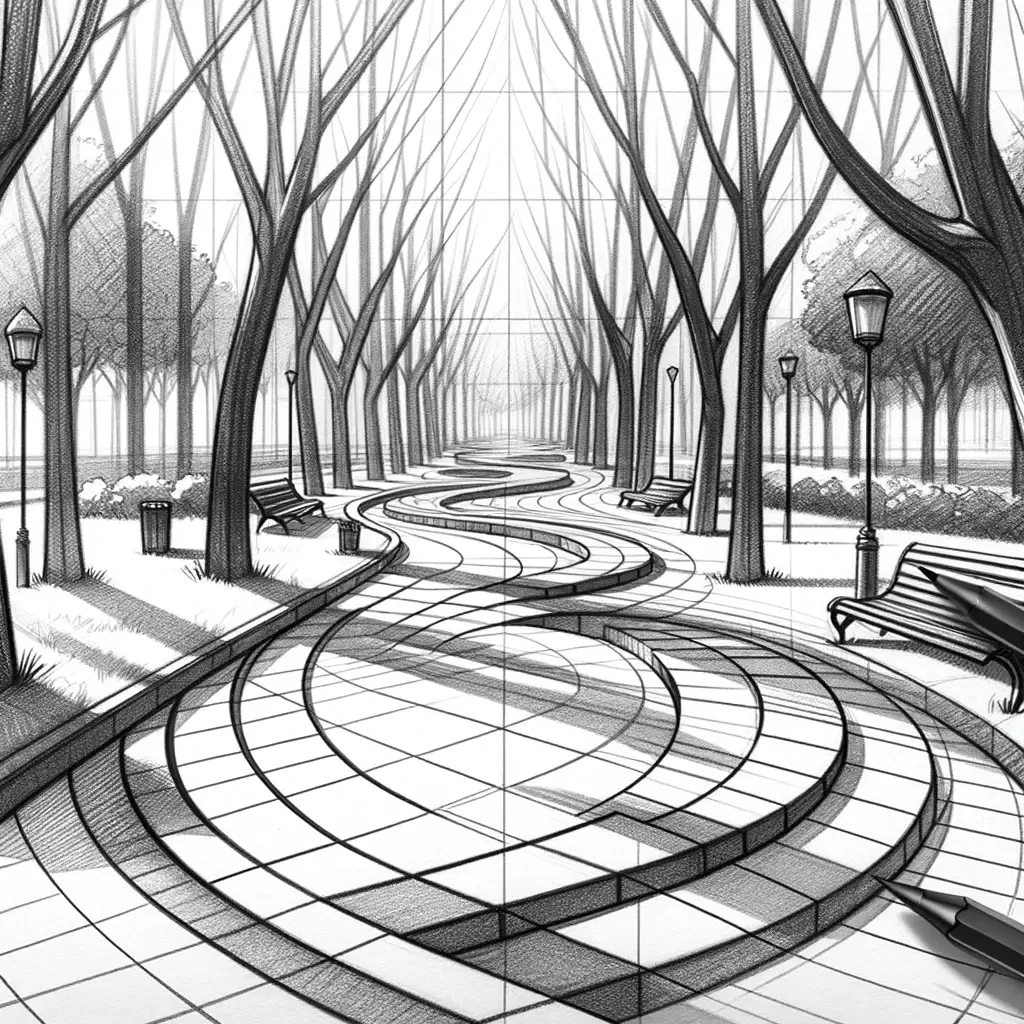
Perspective in Landscape Sketching
Transitioning to the great outdoors, perspective drawing is just as critical in landscape sketching. It’s the invisible grid that helps you place trees, hills, buildings, and pathways in a way that mimics their real-life spatial relationships. By mastering this technique, you can create depth on a 2D surface that feels as expansive as nature itself (Sketch Like An Architect).
Whether you’re drawing a serene park scene or a bustling cityscape, understanding perspective drawing techniques such as one-point, two-point, or three-point perspective will make your landscape drawings come alive. Here’s a simple guide to get you started with landscape sketching:
| Step | Description |
|---|---|
| 1 | Determine the horizon line based on the viewer’s eye level |
| 2 | Place vanishing points for structures within the landscape |
| 3 | Sketch the main elements following the perspective lines |
| 4 | Refine details and add texture to enhance realism |
Embracing perspective drawing in landscape art allows you to convey not just the beauty but the grandeur and scale of the scene. For more in-depth guidance on capturing the natural world through art, be sure to explore our landscape drawing tutorials.
Perspective drawing isn’t just for professional artists; it’s a skill you can apply to your everyday creative projects. With these techniques in your artistic arsenal, watch as your drawings evolve from flat illustrations to fabulous, full-bodied art that impresses and inspires. Dive into doodling, sketching, or pencil drawing with confidence, knowing that perspective is the key to making your art stand out.
[cp_slide_in display=”inline” id=”cp_id_657bb”][/cp_slide_in]