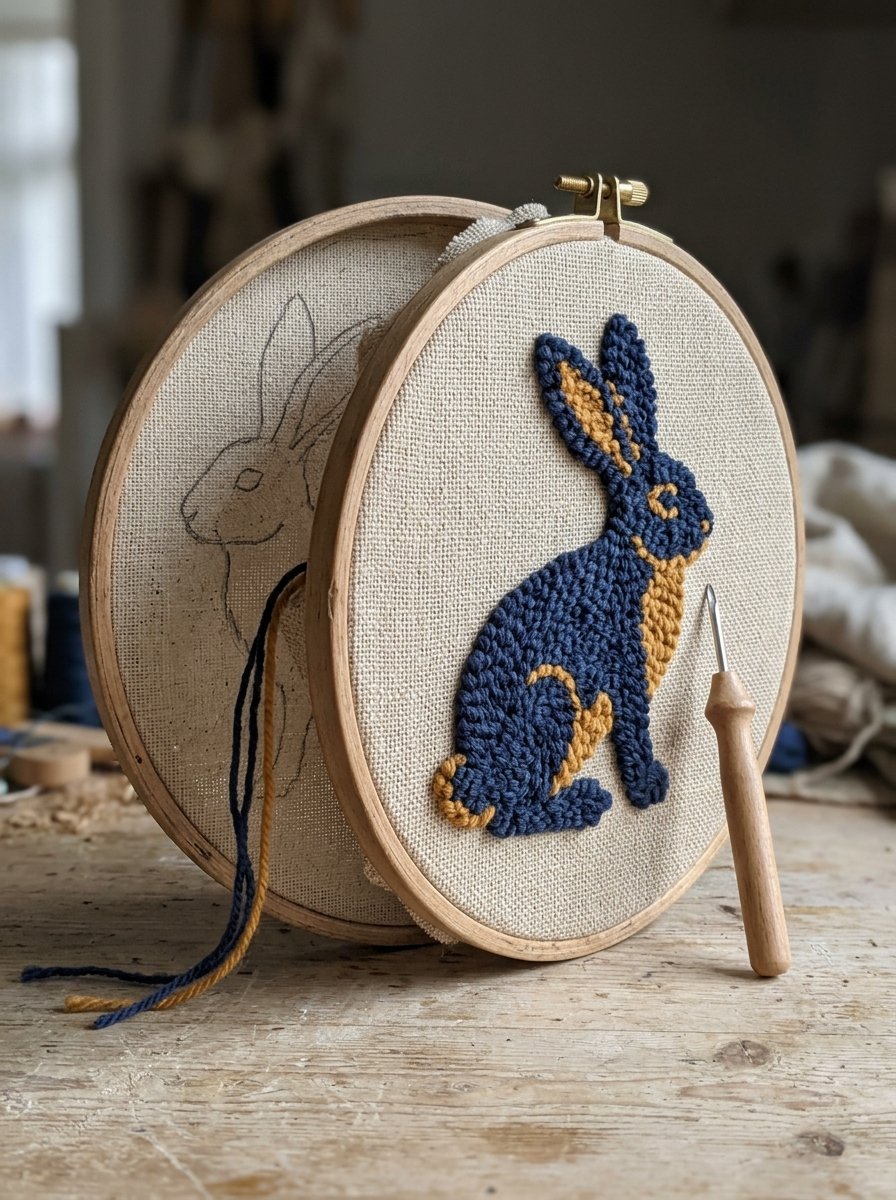
I am punching a hare and I cannot see a single loop of her. Punch needle patterns for beginners are all bold shapes, and that is exactly why.
You never see the design while you make it. You punch from the back, and the picture grows on the front.
So the drawing goes onto the cloth mirrored.
A loop has width. Fine detail has nowhere to sit, so it fills in and goes muddy.
I traced my first design the right way round. The hare came out facing the wall.
Below: where the blind method came from, and 141 shapes that survive it. The gauge sheet is first.
Download the free bold shape gauge →
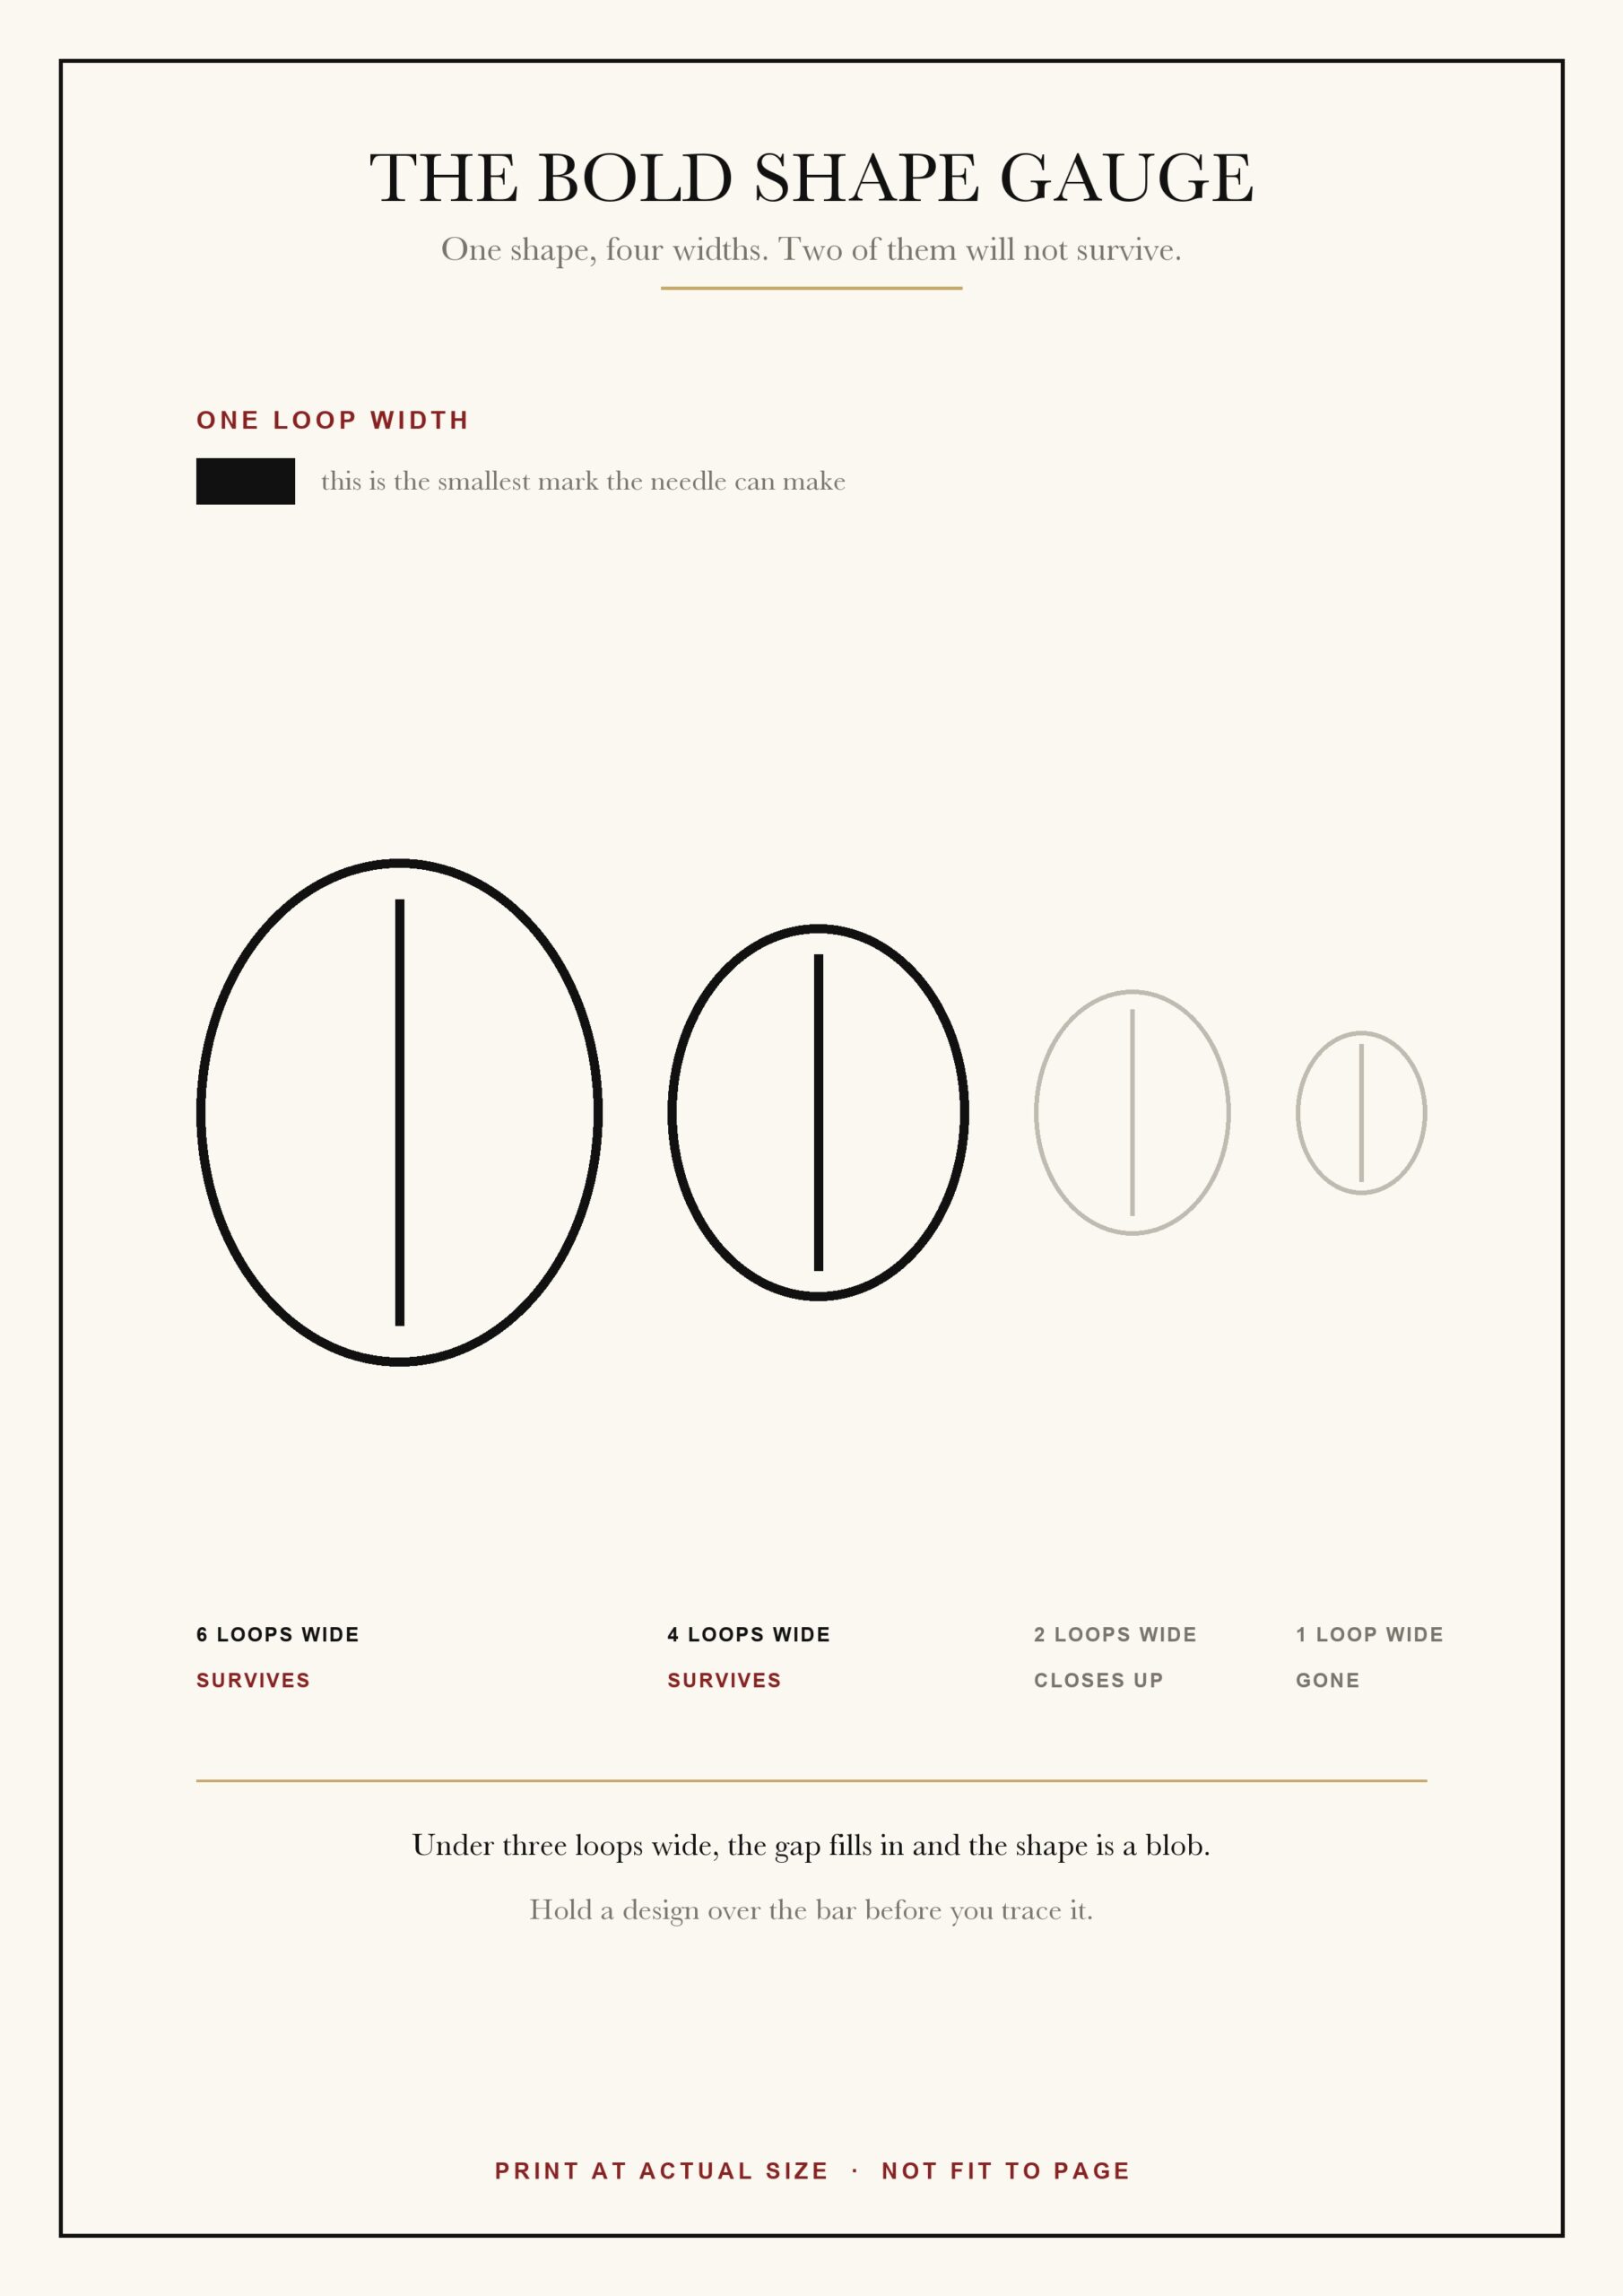
Print it at actual size, not fit to page. (The print box will offer to shrink it. Decline.)
The sheet shows one loop width as a solid bar. Everything else is measured against that bar.
Then the same shape is drawn four times, each one narrower than the last.
The two widest survive. The two narrowest close up and go grey.
That is the whole gauge, and it is the only rule you need on the first evening.
Hold any design over the bar. If a part of it is thinner than three bars, that part will go.
Not soften. Go. The loops meet in the middle and the gap stops existing.
I keep the sheet beside the frame and hold designs against it before I trace anything.
It has saved me two evenings this month, which is more than I expected from a printed bar.
The bar is printed at the width of a standard needle.
If yours is wider, the rule does not change. Only the bar does.
Punch one row on a spare corner of the cloth and measure that instead.
Every frame in this house has a test corner. It looks awful and it has never once been wrong.
What the gauge cannot give you is the shapes themselves, drawn bold enough to pass it.
The Collection
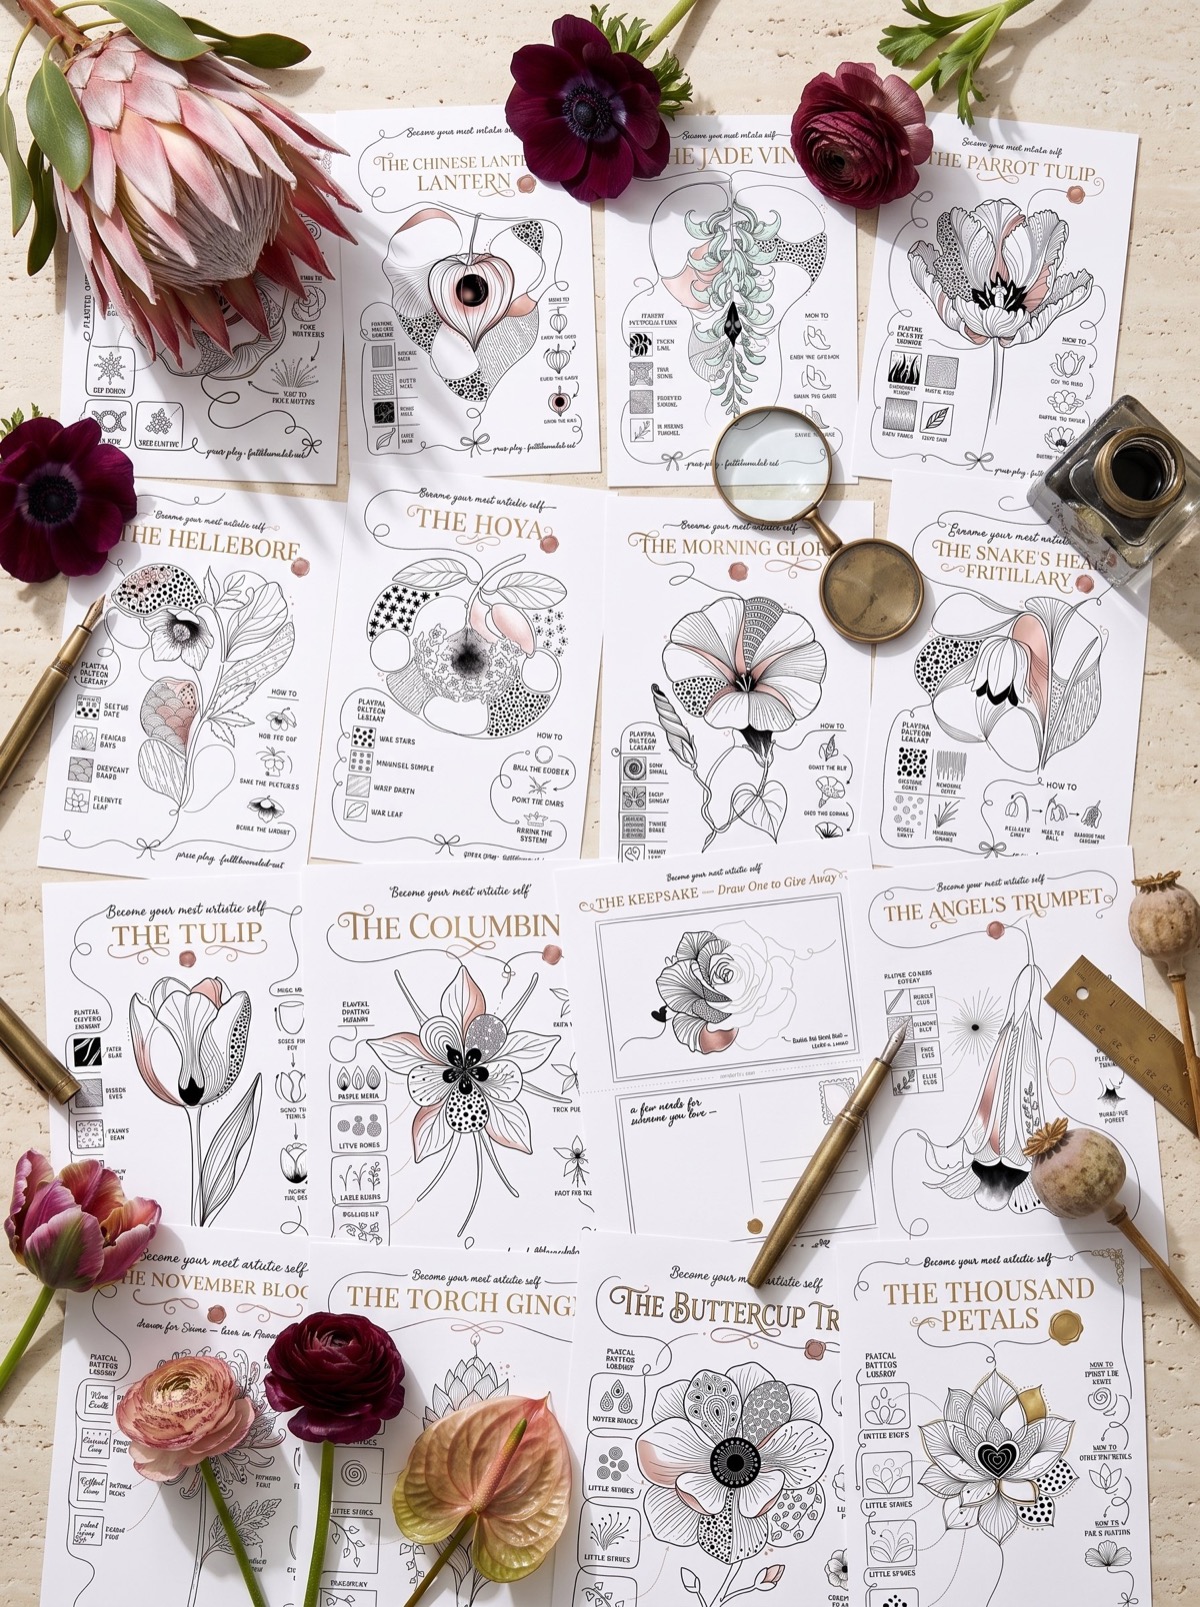
60 flower guides, and every one starts as a shape simple enough to punch.
BLOOM & PATTERN. Tulips, lotus, jade vine, and one very smug rose. For the evening you want a bold outline that somebody else has already drawn. Inside: every flower broken into simple shapes, then dressed with pattern and one solid dark area. (The jade vine looks invented. It is not.) What you get: an outline that survives being punched, and a wall of them by spring.
Now the part nobody explains, which is why any of this is done from the wrong side at all.
Punch needle patterns for beginners start with a drum, and a hand underneath it
Long before anyone punched a loop, there was tambour work.
The cloth was stretched tight in a round frame. The frame is why it has the name.
Sophia Frances Anne Caulfeild, 1824 to 1911, was a needleworker who set out to write down what every stitch in Britain actually did. She and Blanche Saward published the Dictionary of Needlework in 1882, 6 volumes and 800 woodcuts. It says the word comes from the French for a drum, after the shape of that frame.
A fine hook went down through the cloth from above.
The other hand waited underneath, out of sight, holding the thread.
The hook caught the thread below and pulled it back up as a loop.
So the hand doing the real work was under the cloth the whole time.
Here is the part that matters to you.
That dictionary records it was once thought essential that the under hand be visible.
Workers believed the design could not be formed correctly unless you could watch it happen.
Then somebody found it was unnecessary, and the work moved onto thicker cloth and got faster.
The hand under the cloth never needed to be watched. It needed to be trusted.
(I think about that every time I turn a frame over early to check.)
Checking is the habit to break. Punch 6 loops, then look, not every single one.
Each loop is held by the one that comes after it
Nothing is knotted. That surprises people, and then it worries them.
The 1882 entry describes the tambour chain exactly.
The thread is drawn through from the back to the front in a run of loops.
Each new loop catches and secures the one before it.
A punch needle does the same job with a blunter tool and thicker yarn.
The loops hold because they are packed against each other. Friction is the only fastening.
Which tells you the two things that go wrong.
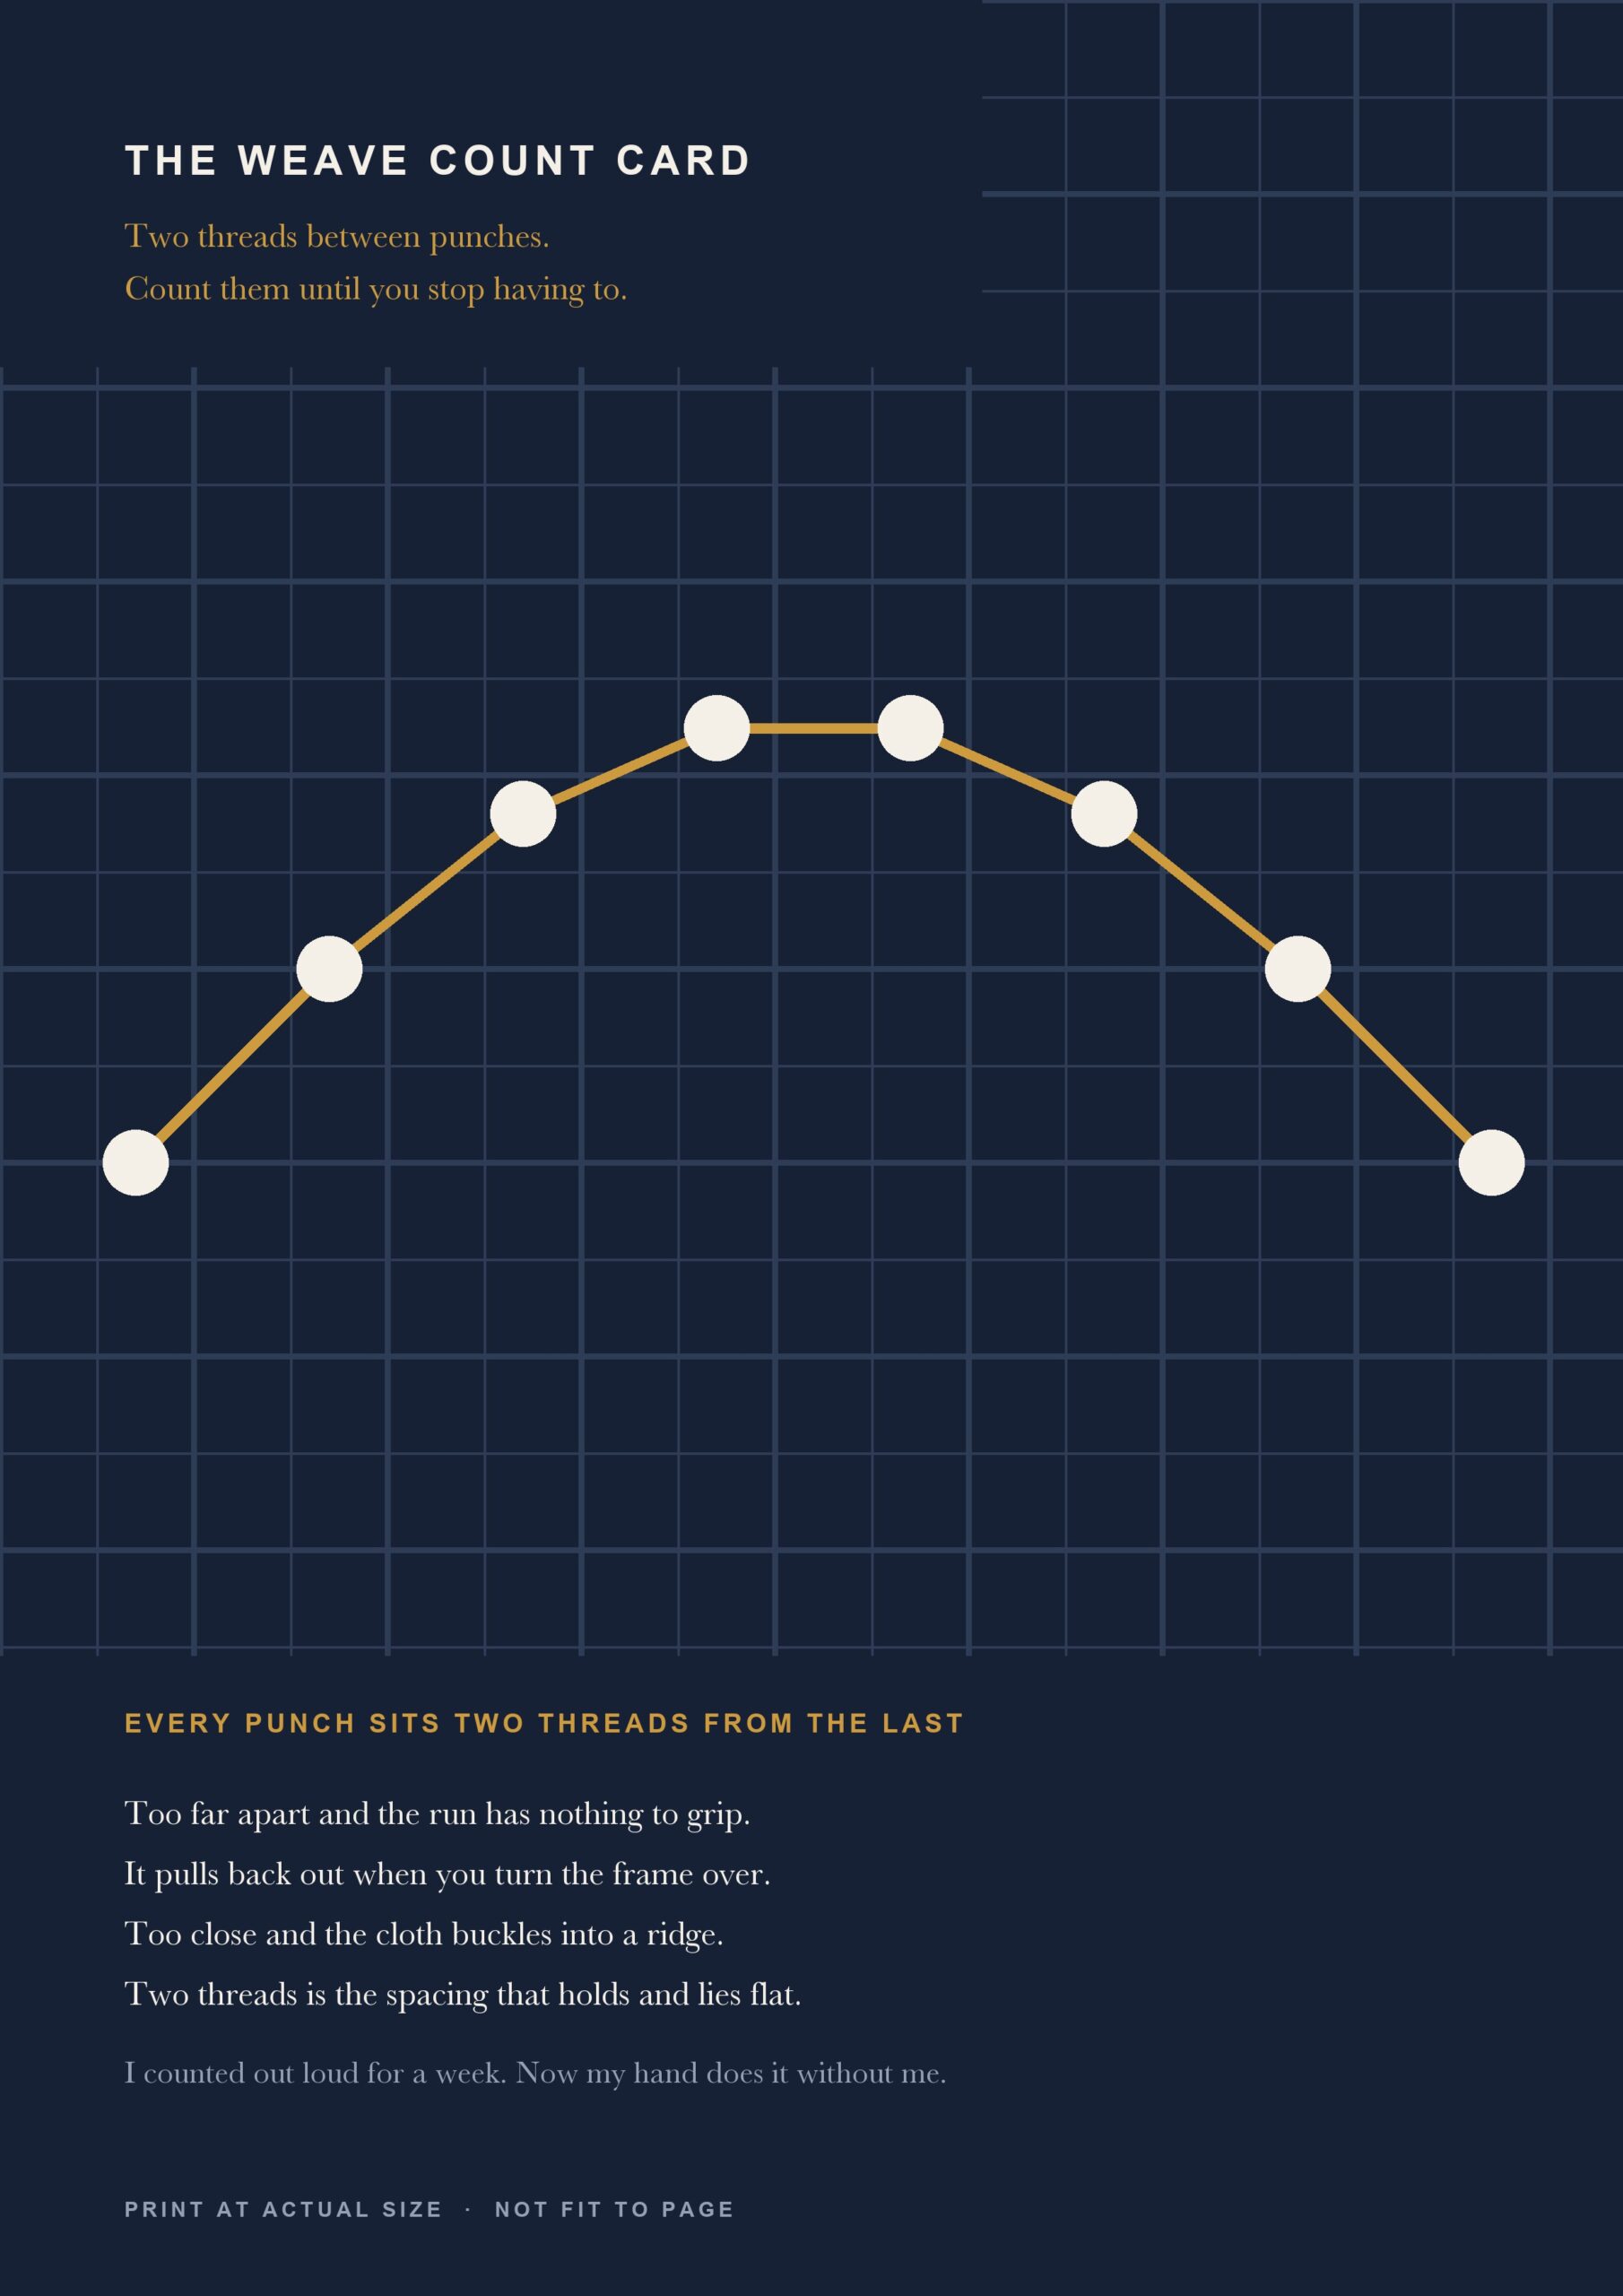
Punch too far apart and the run has nothing to grip, so it pulls back out.
Punch too close and the cloth buckles into a ridge.
Two threads of the weave between punches is the working spacing on monk’s cloth.
I counted them out loud for a week. Now my hand does it and I have stopped listening to myself.
Pull one loop and the whole run unzips like a sack of flour. (Ask how I found the comparison.)
Wittich sold a grid in 1810, and beginners stopped having to draw
Before printed patterns, a design was painted straight onto the canvas by hand.
The dictionary is blunt about the result.
Little variety could be marked out, and the rest was left to whoever held the brush.
If you could not draw, you could not start. That was the whole barrier.
Coloured paper patterns arrived in Berlin in 1804.
Then in 1810 a printseller named Wittich published a series of them, drawn on point paper.
A single original cost £40, which tells you how badly they were wanted.
Point paper is squared paper. One square is one stitch.
So the drawn line was replaced by a count, and a count is something anybody can follow.
That is the ancestor of every traceable pattern here, and it is a cheerful story.
A printseller worked out that people wanted to make the thing, not to prove they could draw it.
The grid did not lower the standard. It removed the audition.
Your version is a printed outline and a window. I still trace, and I have stopped apologising.
If tracing troubles you, the grid method makes the case at length.
Wittich sold the count. Edward Sands Frost, 1843 to 1894, sold the outline. He was a tin pedlar in Maine who watched his wife hook a rug, drew her a better design, and then could not keep up with the orders.
So he cut the designs into sheets of zinc and printed them straight onto the burlap. The Met holds one of his rugs from about 1870, wool and cotton, 161cm tall.
A stencil is a drawing somebody else already committed to. That is what the outline on your sheet is, and there is nothing to apologise for in using it.
The needle carries its eye near the tip, and that changes everything
A sewing needle has its eye at the blunt end. A punch needle does not.
Its eye is drilled just above the point, which the documented description of the tool treats as its defining feature.
The yarn runs down the shaft and out near the tip, so the tip delivers it.
That is why the depth you push decides the loop height.
Push to the handle and you get a tall loop. Push half way and you get a short one.
The same tool makes both. You are not changing needles, you are changing how far you shove.
One more rule falls out of the tool, and it is the one beginners miss.
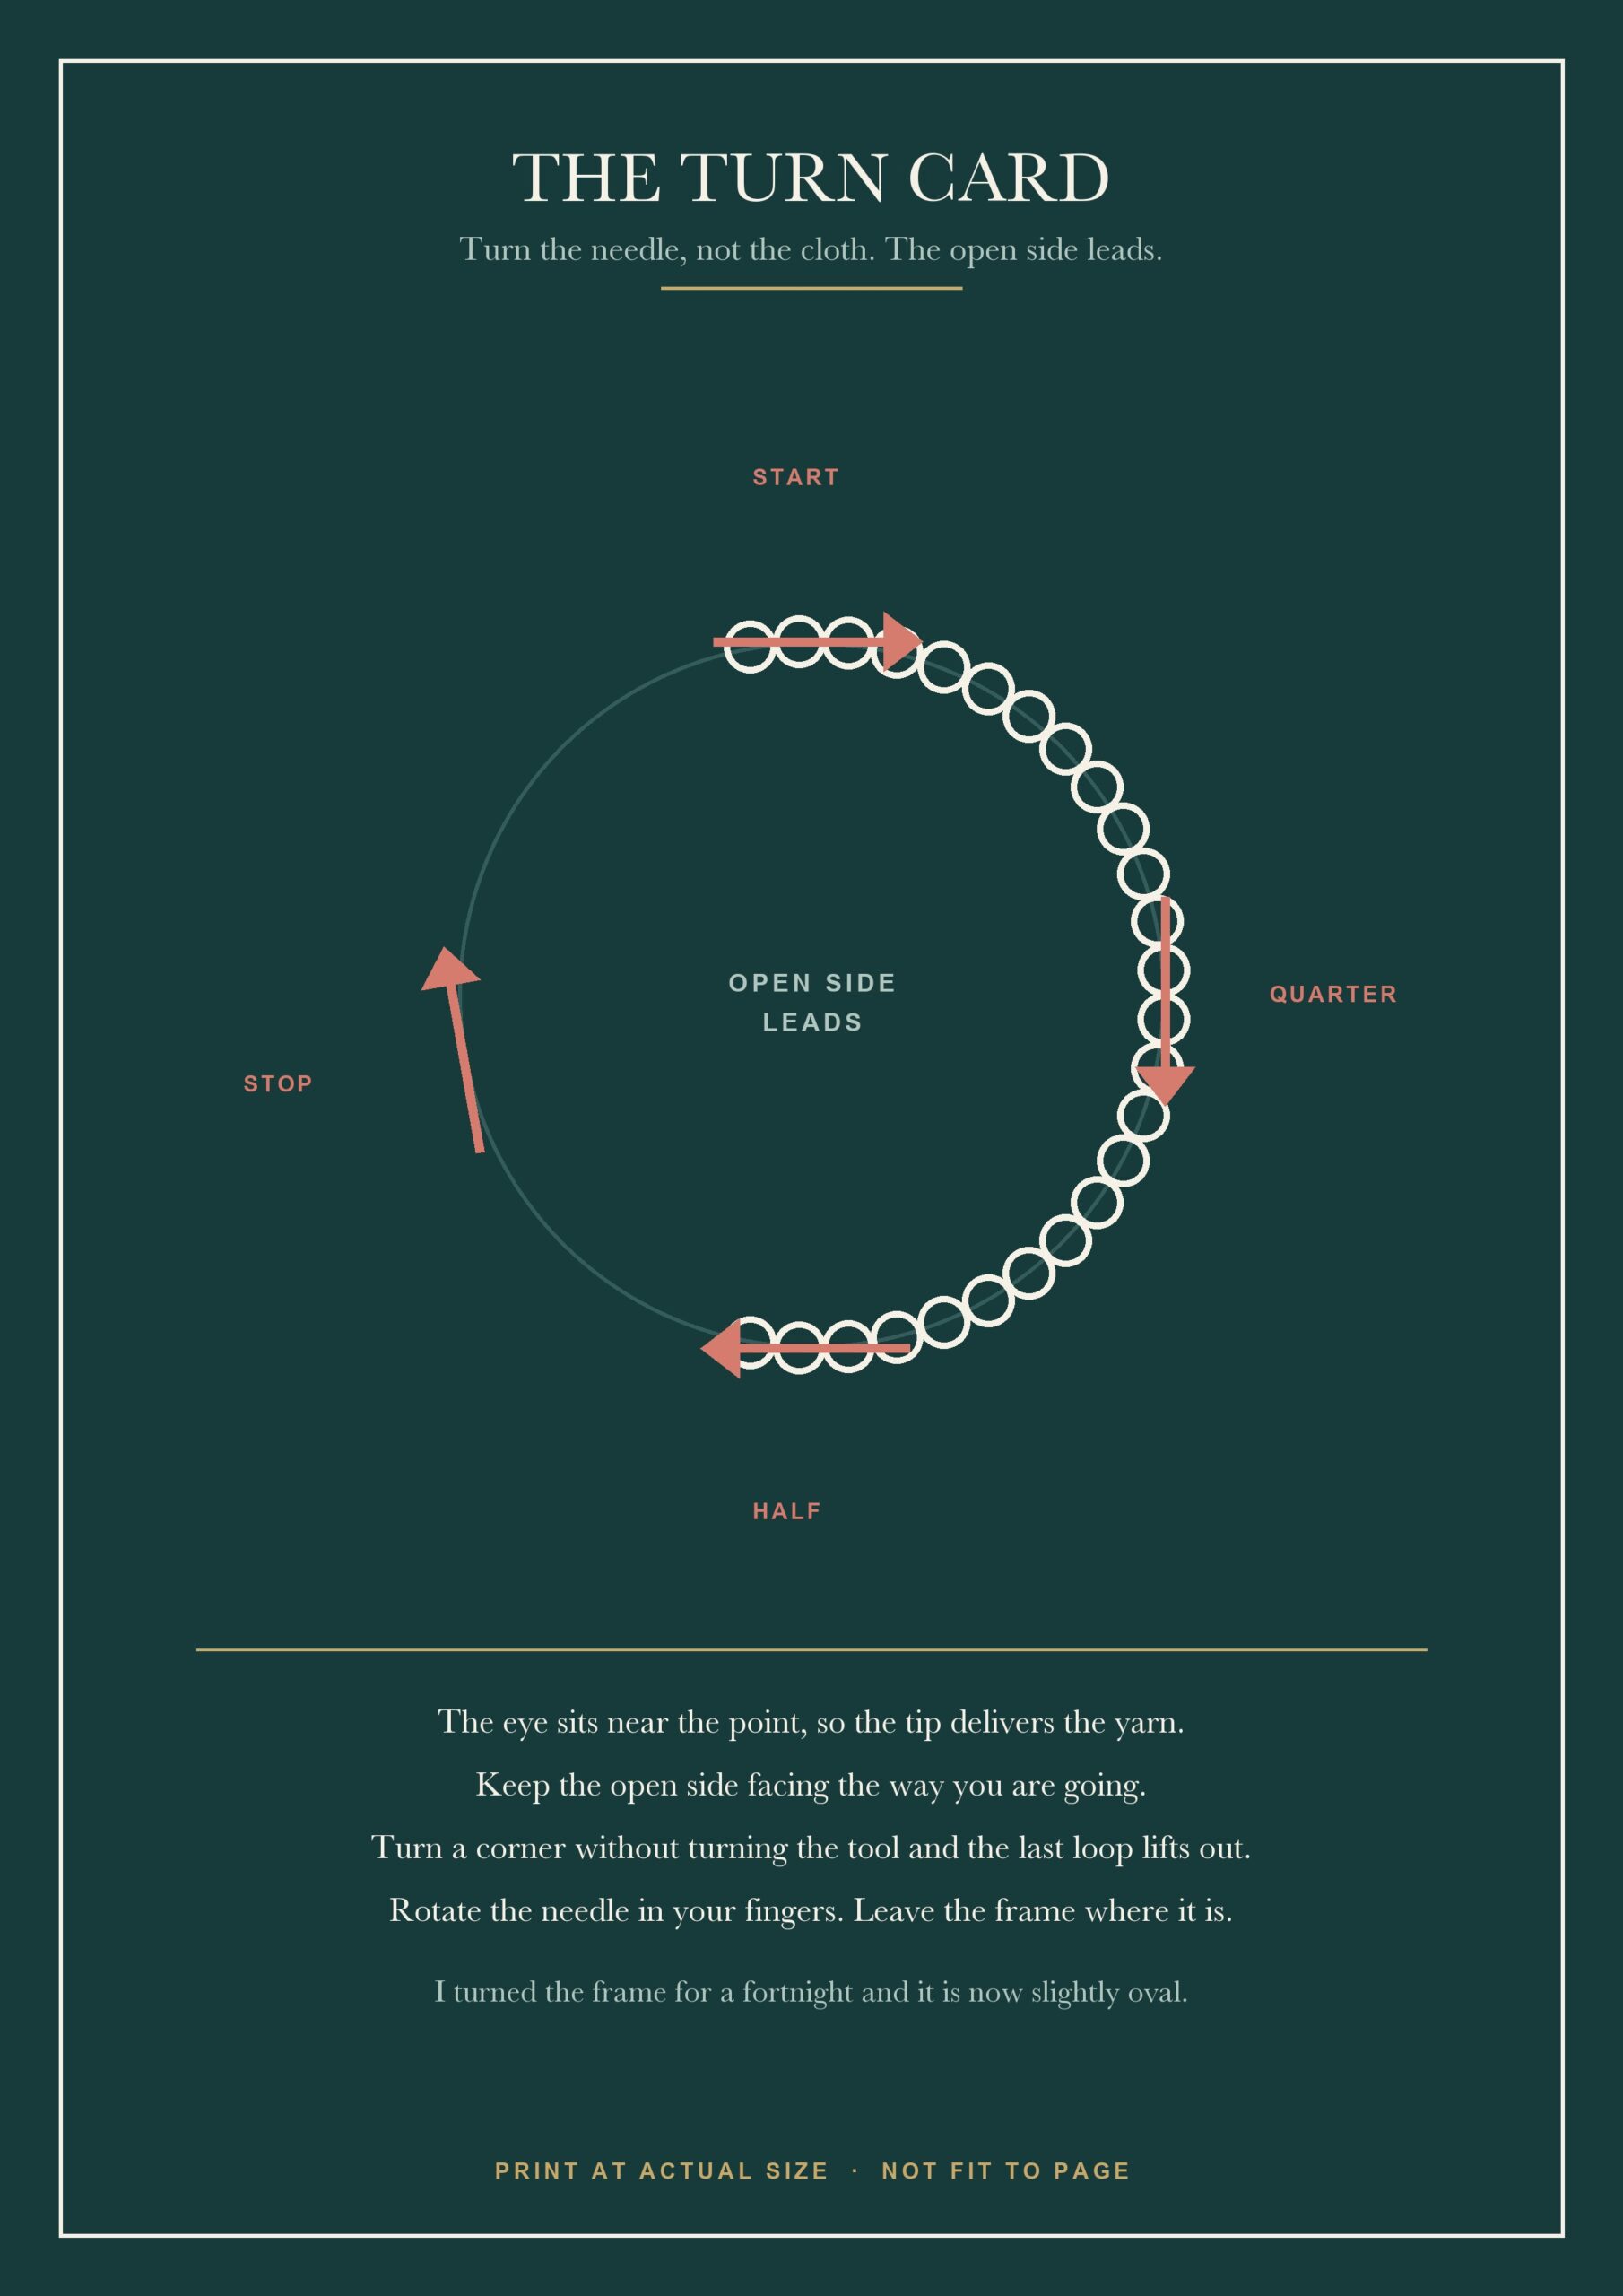
The open side of the eye must face the way you are travelling.
Turn a corner without turning the tool and the last loop pulls straight back out.
So you rotate the needle in your fingers, and leave the frame where it is.
(I rotated the frame for a fortnight. It is now slightly oval and I am not discussing it.)
What punch needle patterns for beginners will not let you draw
Every rule above narrows to one sentence.
The needle sets the smallest shape you are allowed to draw.
Three loop widths is the working floor.
Under that, a gap closes and two lines merge into one.
So whiskers go. Eyelashes go. Lettering in a fine script goes.
Nothing is lost that was going to work anyway.
What survives is an outline, one solid area, and a gap wide enough to stay a gap.
Draw the shape first and the detail never. That order is the entire skill.
I test a design by squinting at it from the far side of the room.
If it still reads as a hare at that distance, it will read as a hare in wool.
If it turns into a grey smudge, the smudge is what the evening was going to produce.
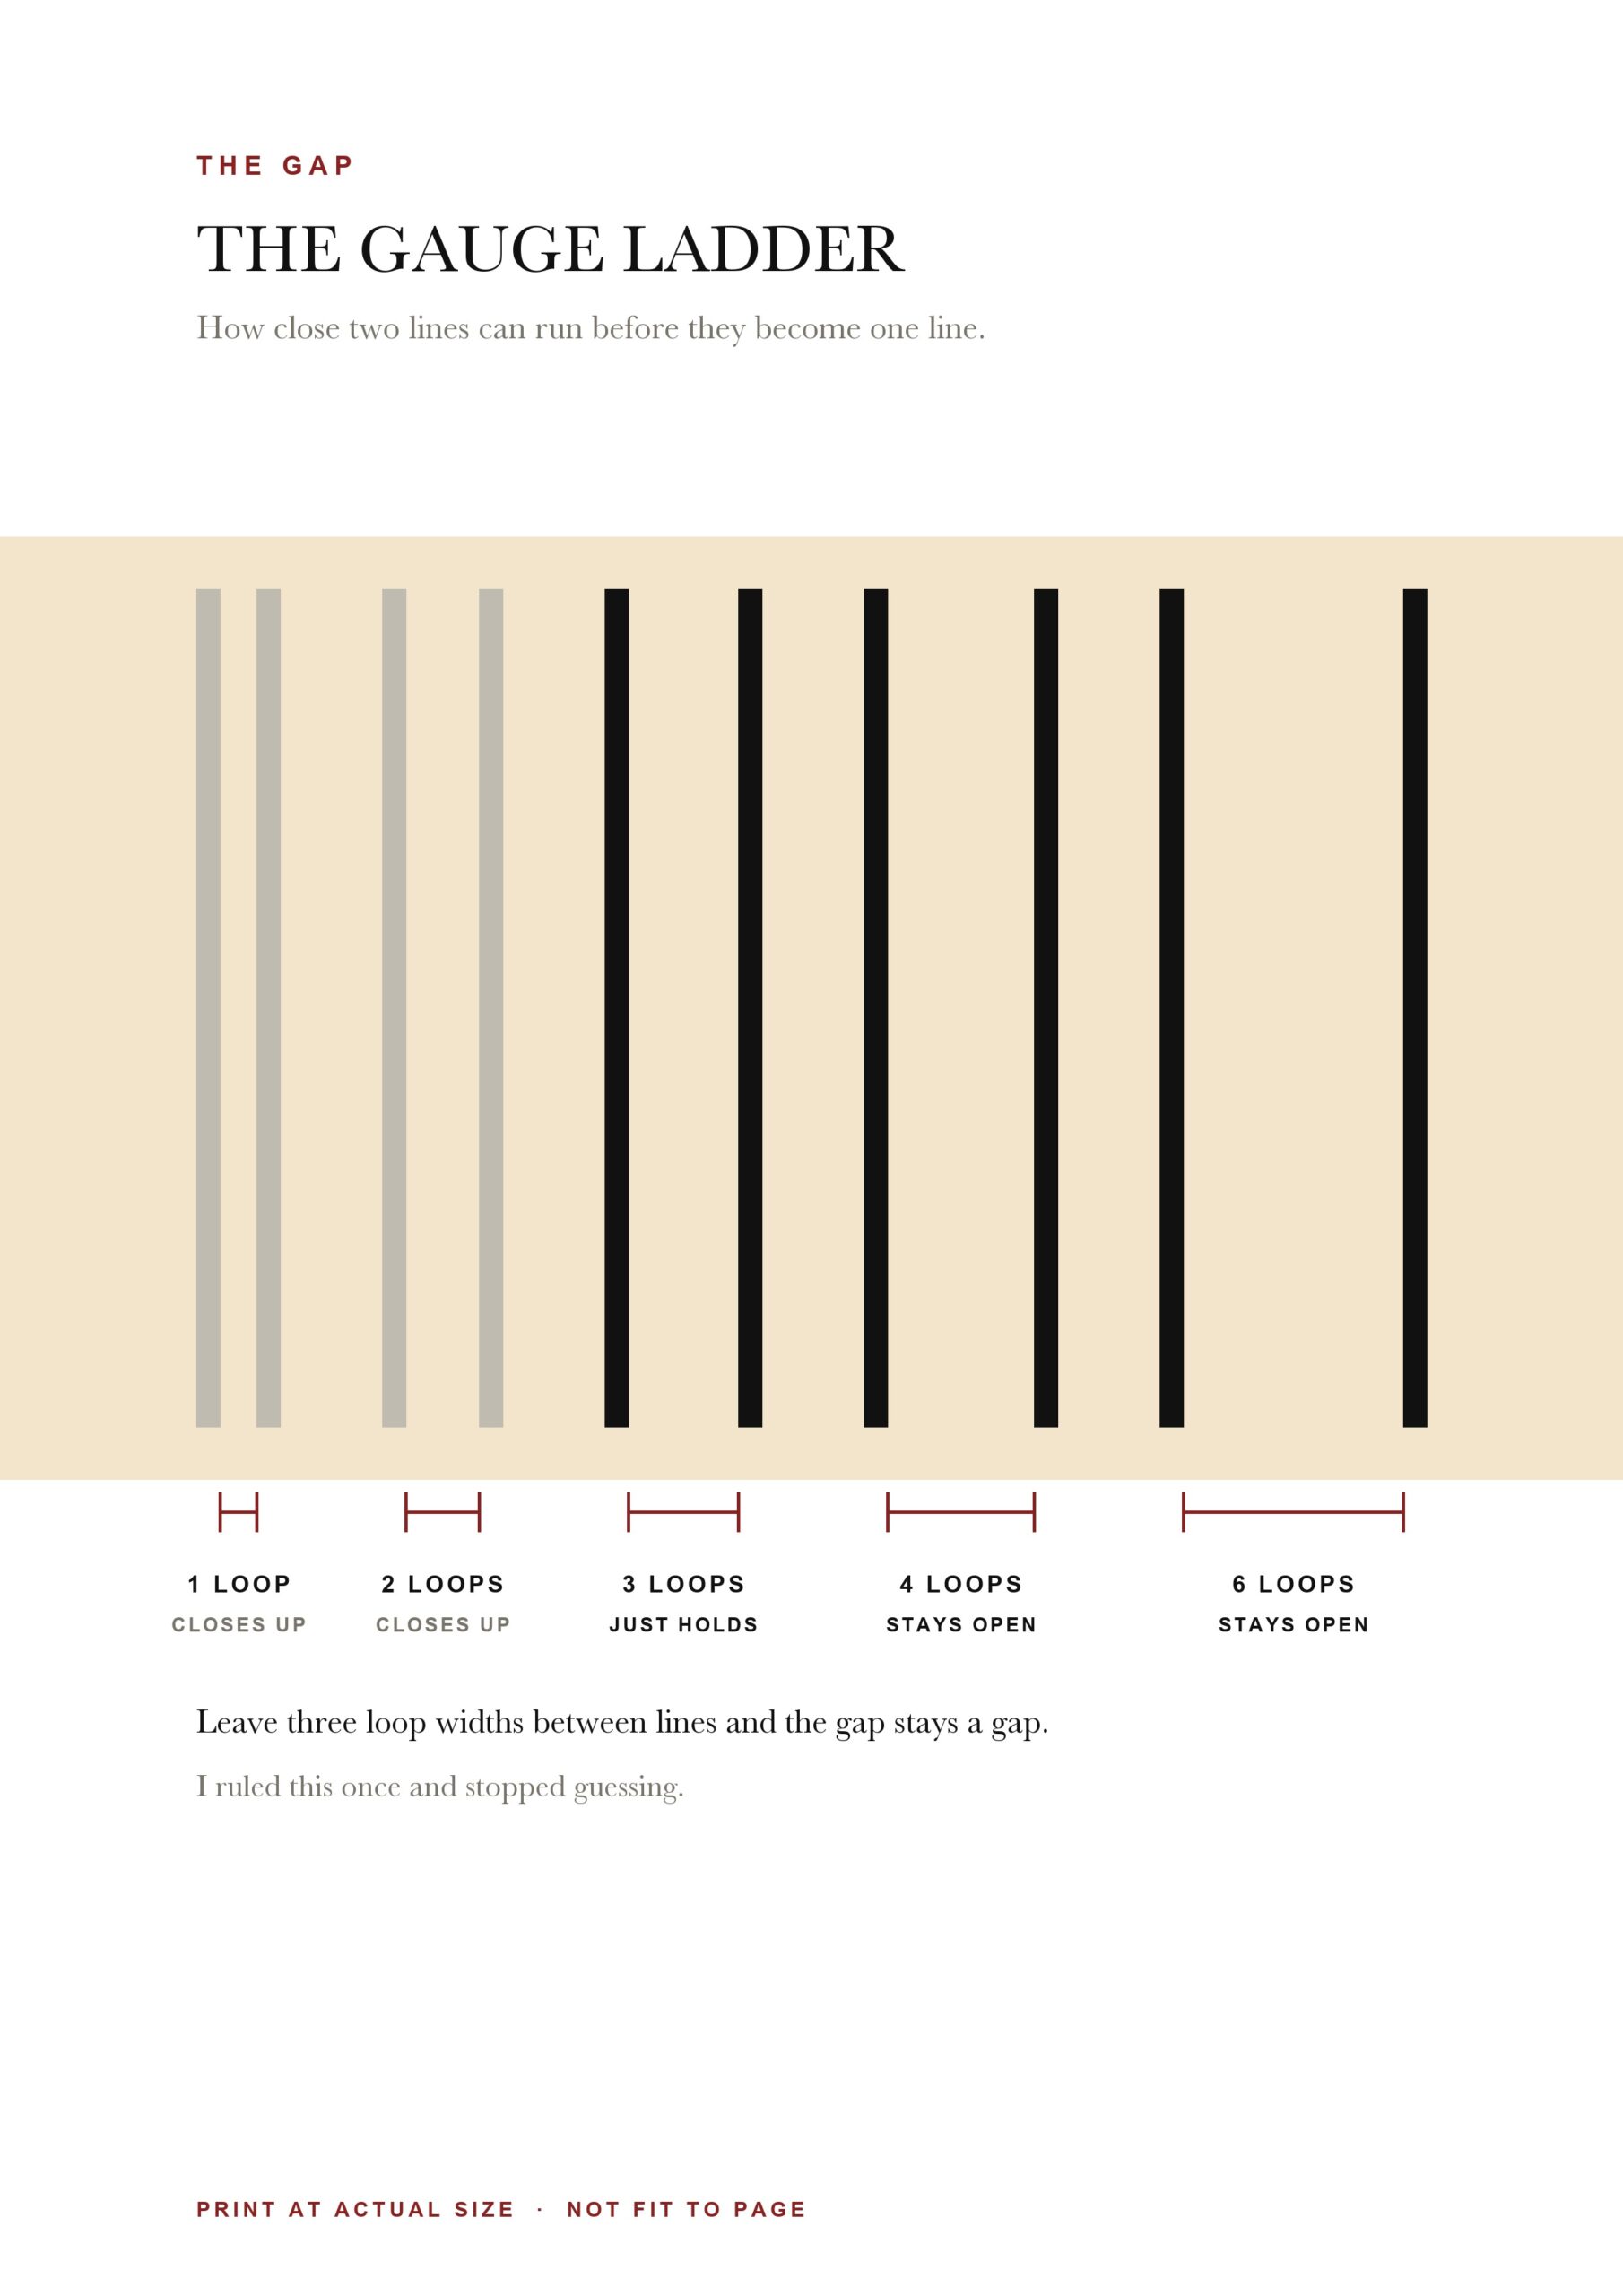
The ladder above is that test ruled out, so a design can be held against it before you trace.
One woman drew over 1,000 of these outlines. Pearl McGown, 1891 to 1983, started selling her own hooked-rug patterns in 1928 and ran the first annual hooked-rug exhibition from 1940.
Her whole argument was about shading. She ran dye workshops so her students could mix the exact wool they needed, and she pushed them off bought patterns onto their own drawings.
Which is the order to copy. Borrow the outline first. Change one colour in it, then two. By the fourth piece the design is yours and nobody can tell you where it came from.
141 punch needle patterns for beginners, grouped by the shape that survives
These are grouped by what the gauge does to them, not by subject.
Round and closed shapes are the kindest first punch. The outline does all the work.
Start in the middle and spiral outwards, or the edge drifts.
A apple, a pear, a plum. A fig, a quince, a peach. A lemon, a orange, a pomegranate. A persimmon, a cherry pair, a grape bunch. A full moon, a crescent moon, a half moon. A sun with rays, a hen’s egg, a duck egg. A acorn, a conker, a walnut. A pebble, a hot air balloon, a teapot.
Lobed and leafy shapes come next. The lobes have to be fat, or they close into a paddle.
Punch the outline first and fill afterwards. I did it the other way once and the edge wandered.
A oak leaf, a ivy leaf, a maple leaf. A ginkgo fan, a fig leaf, a monstera. A fern frond, a bay leaf, a olive sprig. A eucalyptus round, a holly sprig, a laurel spray. A bracken curl, a hosta leaf, a lily pad. A clover, a wheat ear, a grass tuft. A pine cone, a pine bough, a palm frond. A banana leaf, a nettle leaf, a vine tendril.
Flowers work when you treat the bloom as one silhouette and forget the petals.
A daisy is a disc with notches, not a ring of separate shapes.
A daisy, a tulip, a poppy. A rose, a peony, a dahlia. A sunflower, a anemone, a camellia. A magnolia, a lotus, a hibiscus. A cosmos, a marigold, a zinnia. A hellebore, a columbine, a foxglove spire. A lupin spire, a hollyhock, a thistle. A allium globe, a dandelion clock, a protea.
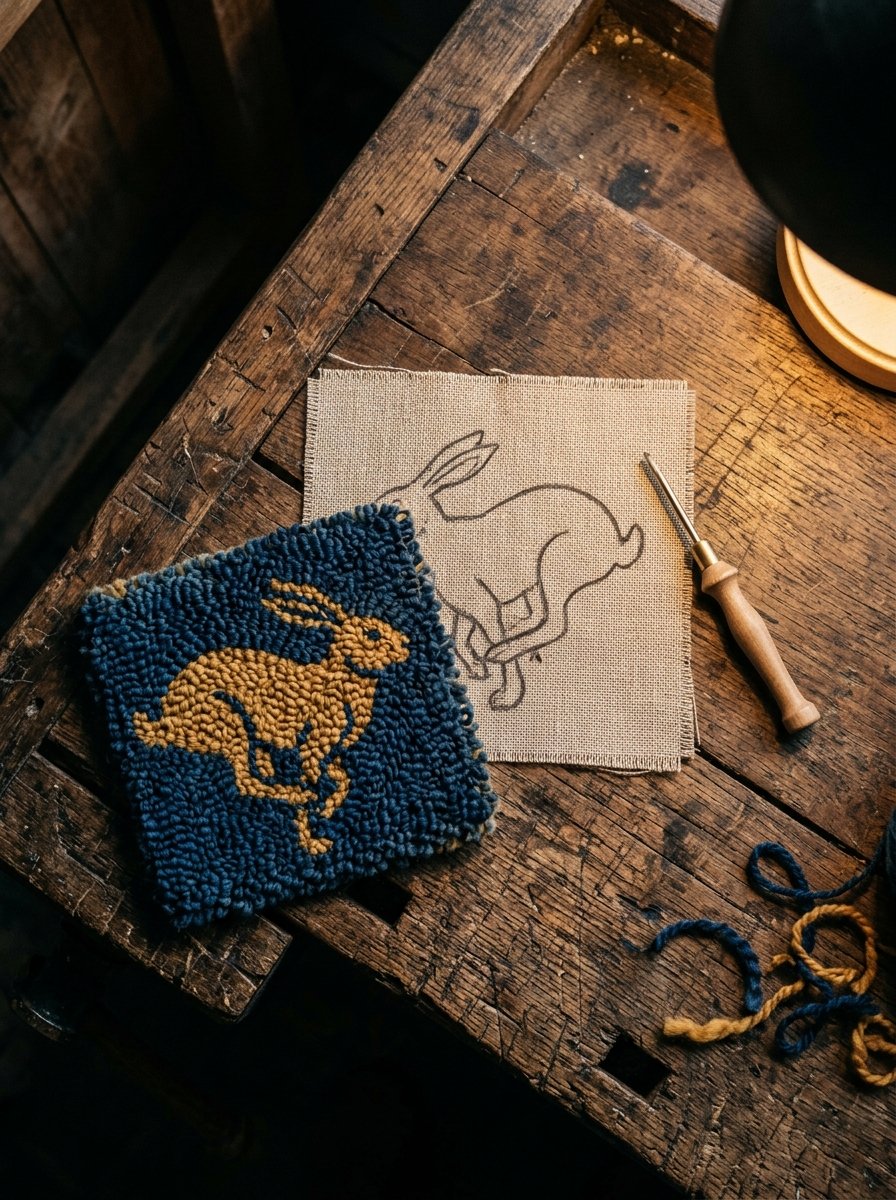
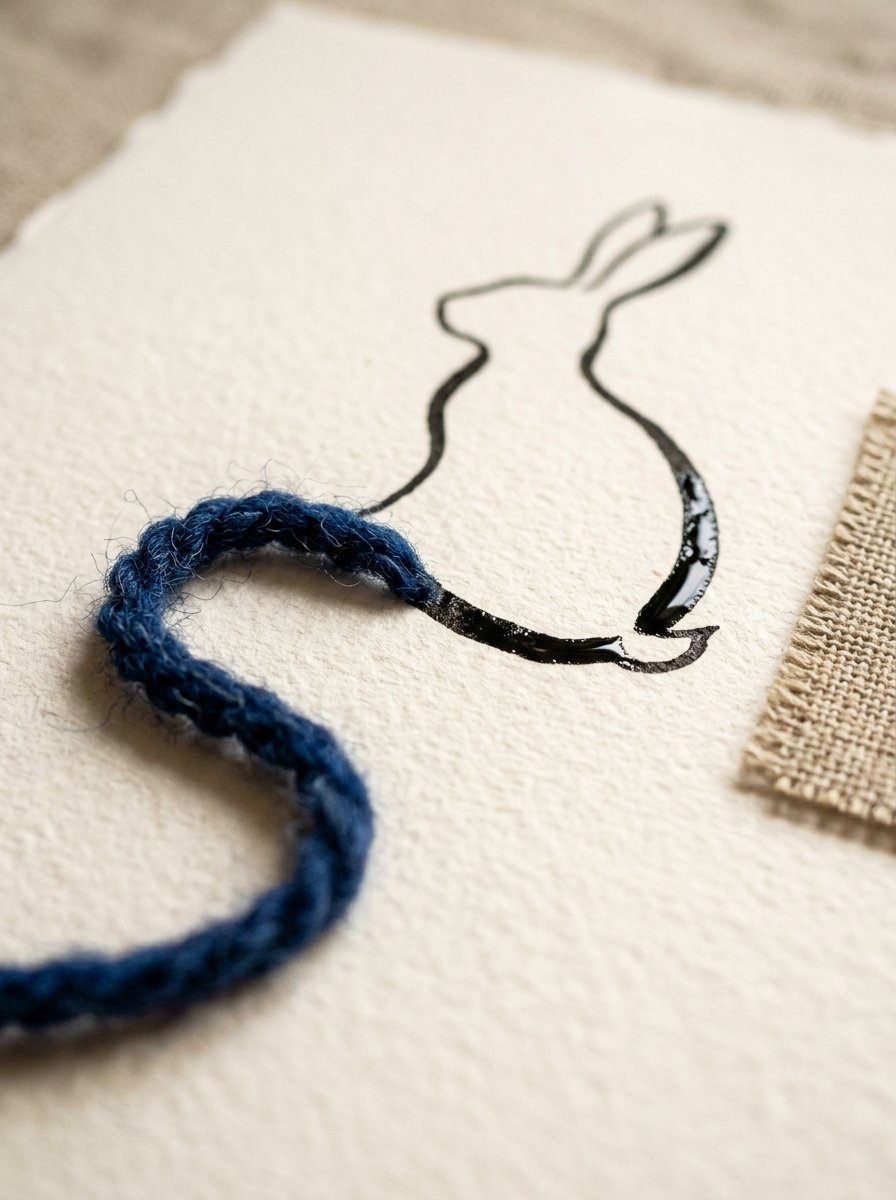
That is the whole mirror rule in one photograph, and it is worth a long look.
The bare cloth carries the hare backwards. The finished piece carries it the right way round.
Creatures survive as one silhouette. Draw the outline and stop before the face.
A face at this gauge is two dots and a mouth, added last, or left off entirely.
A curled cat, a sitting cat, a sitting dog. A hare, a fox, a hedgehog. A mouse, a squirrel, a badger. A deer head, a sheep, a cow. A horse, a pig, a duck. A goose, a hen, a owl. A wren, a swallow, a heron. A whale, a fish, a snail.
Bands and borders are the fastest win, because a repeat forgives one poor unit.
Rule two faint lines first and punch between them. (Freehand borders wander, and it compounds.)
A scallop row, a chevron band, a wave line. A rickrack, a dot row, a dash row. A checker band, a diamond row, a triangle row. A arch row, a loop border, a braid band. A zigzag ribbon, a stripe pair, a half-moon row. A petal border, a leaf chain, a berry chain. A star scatter, a brick repeat, a basket weave.
Small gifts and letters finish the set. Each one is a coaster or a hoop in an evening.
Letters must be reversed before they go on, exactly like the hare above.
A heart, a double heart, a star. A compass star, a sunburst, a rainbow. A cloud, a raindrop, a snowflake. A mountain, a house, a door. A window box, a teacup, a mug. A bowl, a jug, a spoon. A mitten, a sock, a hat. A boot, a key, a initial letter.
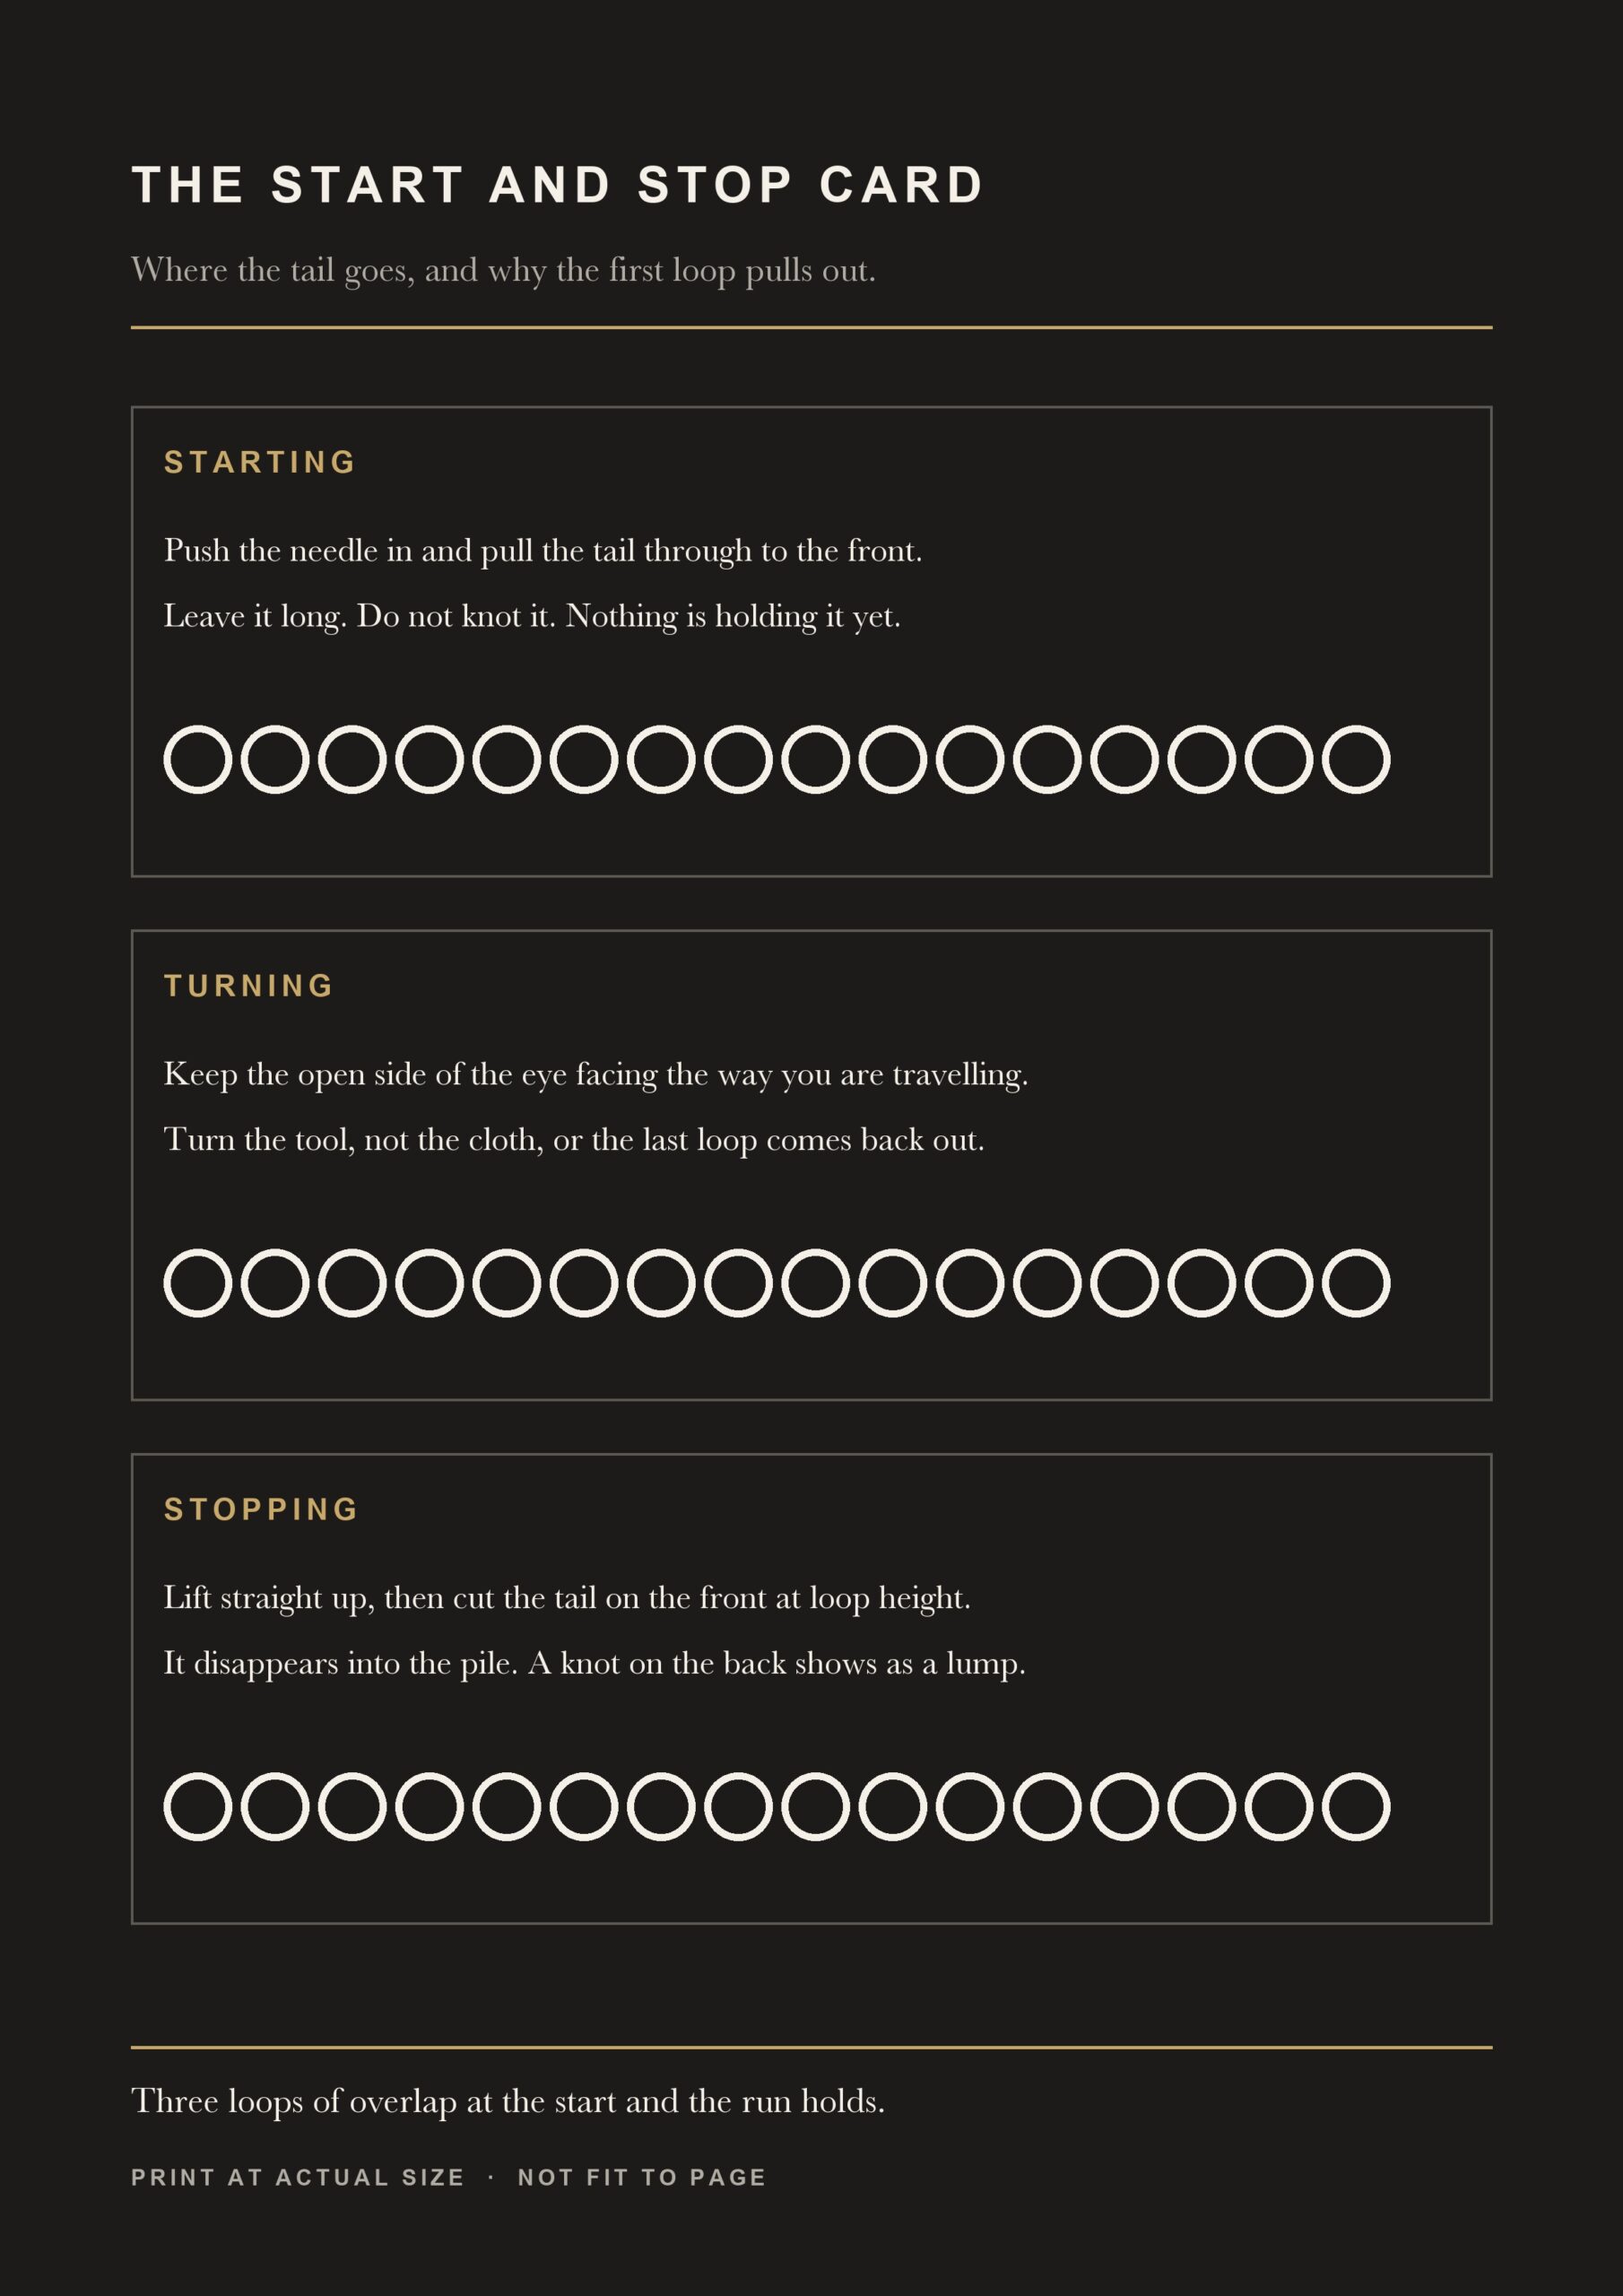
Start and stop the same way every time and the back stays flat.
Tails go through to the front and get cut at loop height, where they vanish into the pile.
A knot on the back is a lump you will feel through the cloth for the rest of its life.
Free Starter Pack
A punched outline leaves the middle empty: get 10 free pattern templates.
Sent tonight. Fills bold enough to survive a loop, for the shape you just outlined.
Unsubscribe in 1 click, no hard feelings
Those fills go inside a shape once the outline holds, and the outline is the hard part.
60 flowers already reduced to the shapes a needle can hold
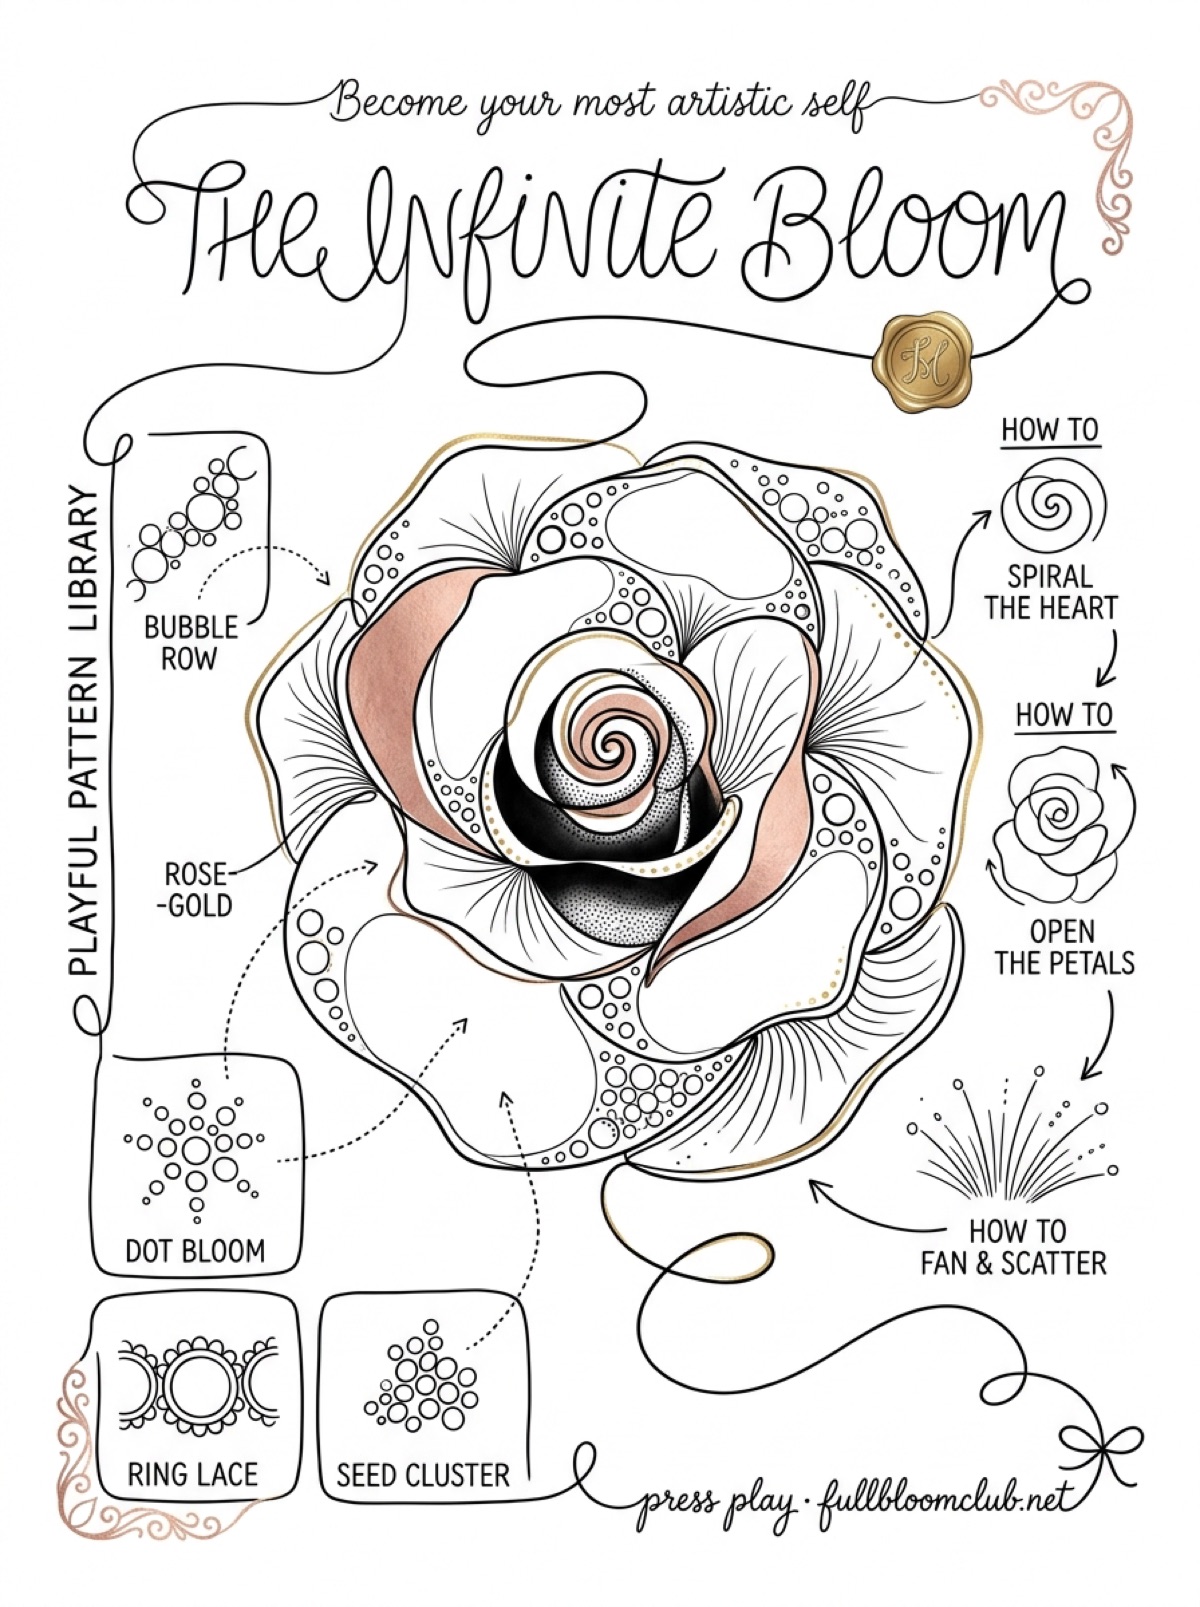
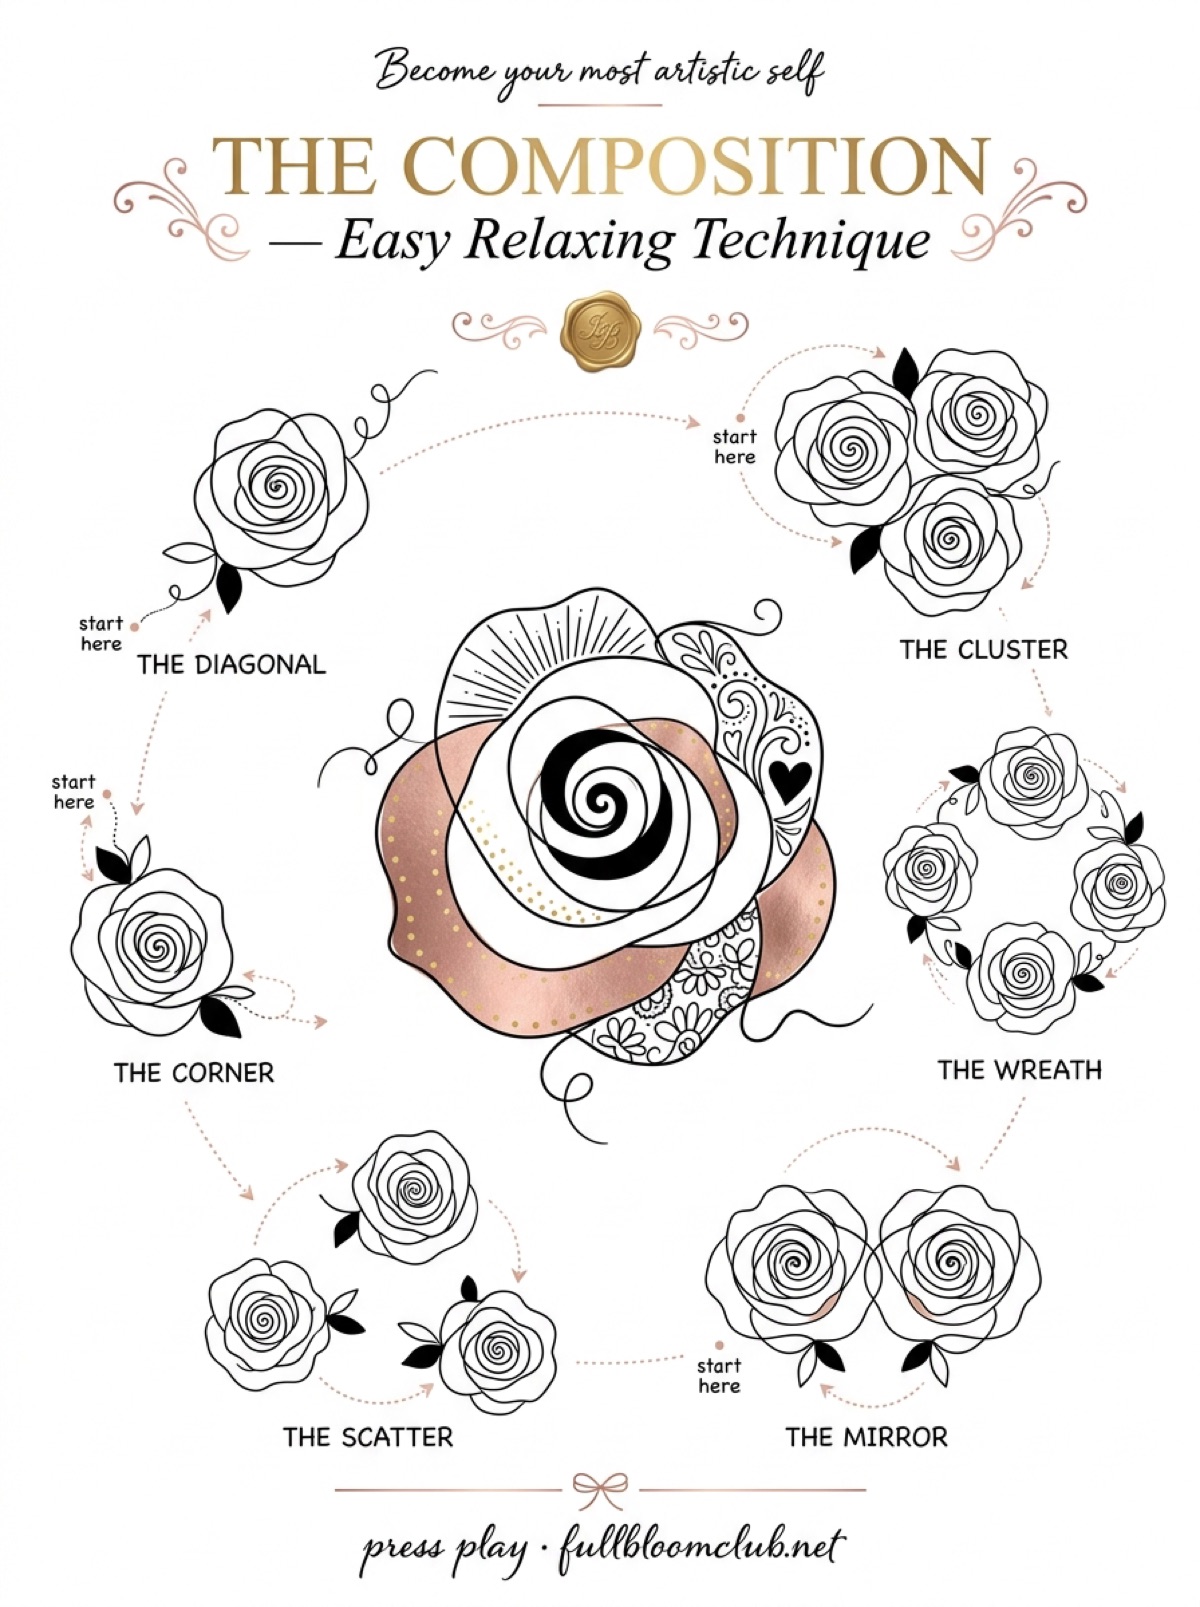
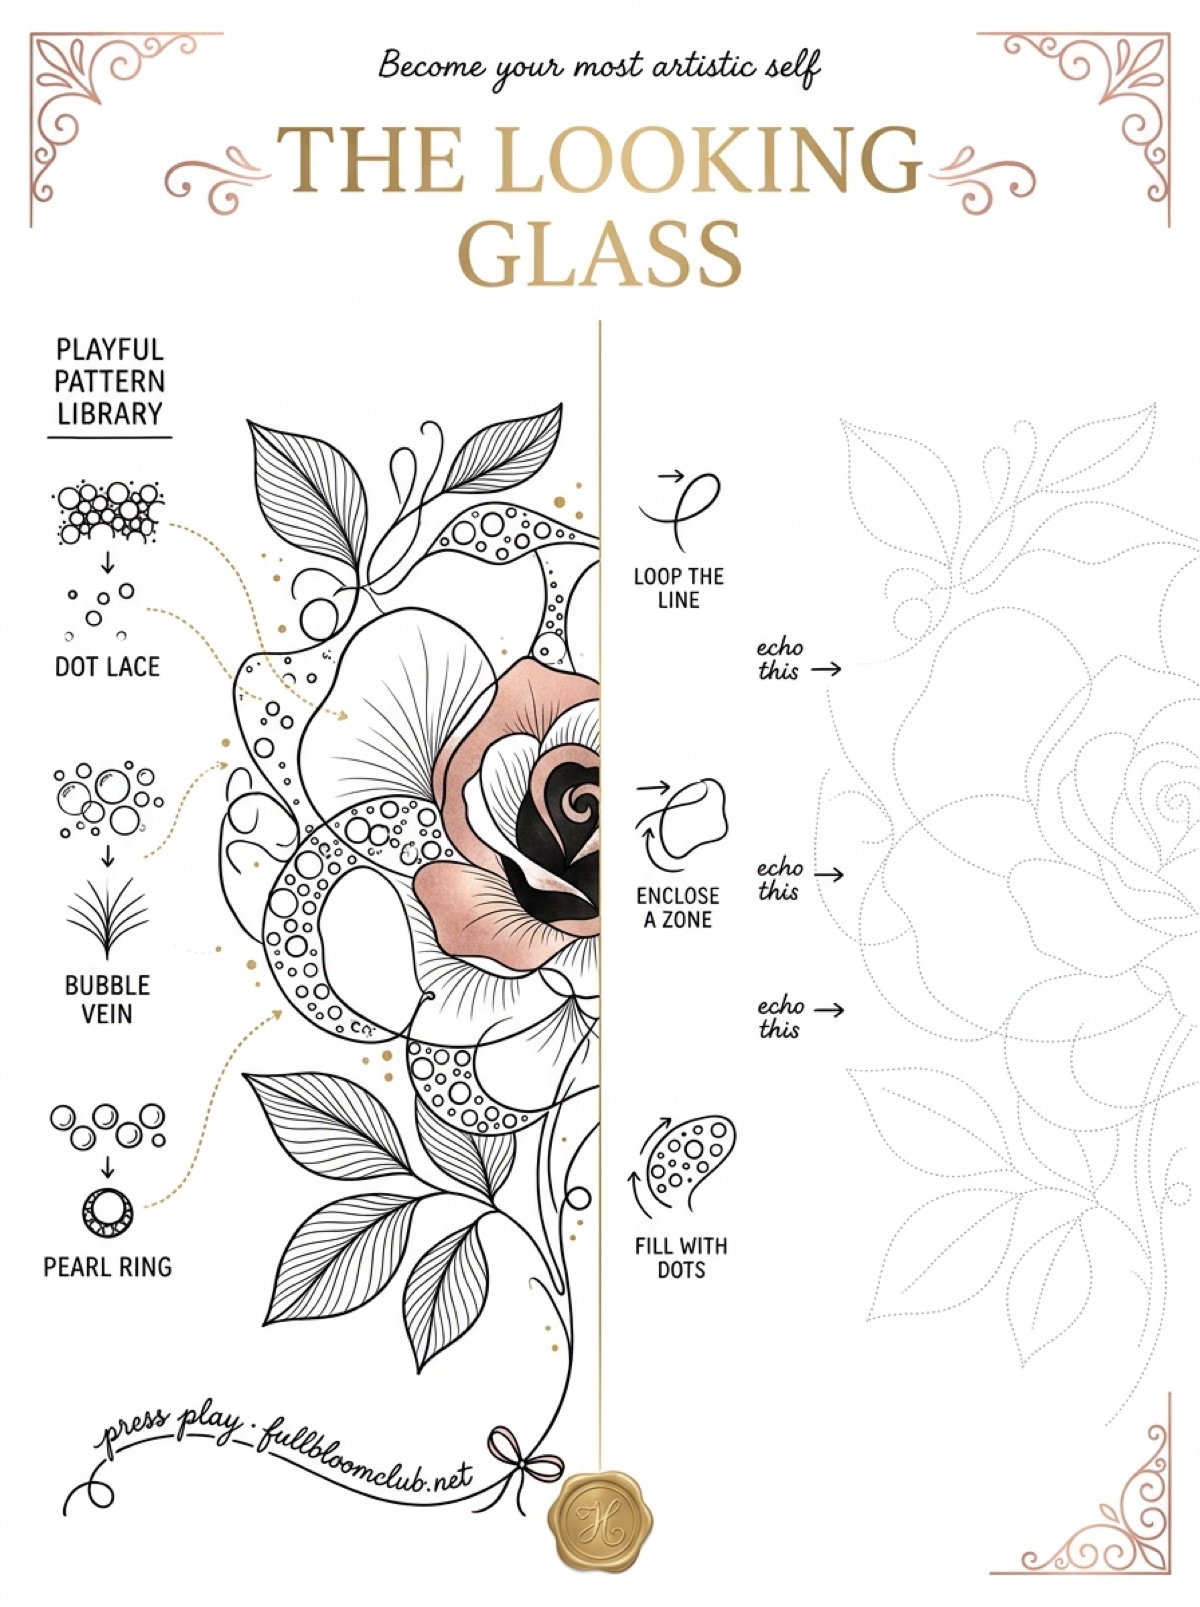
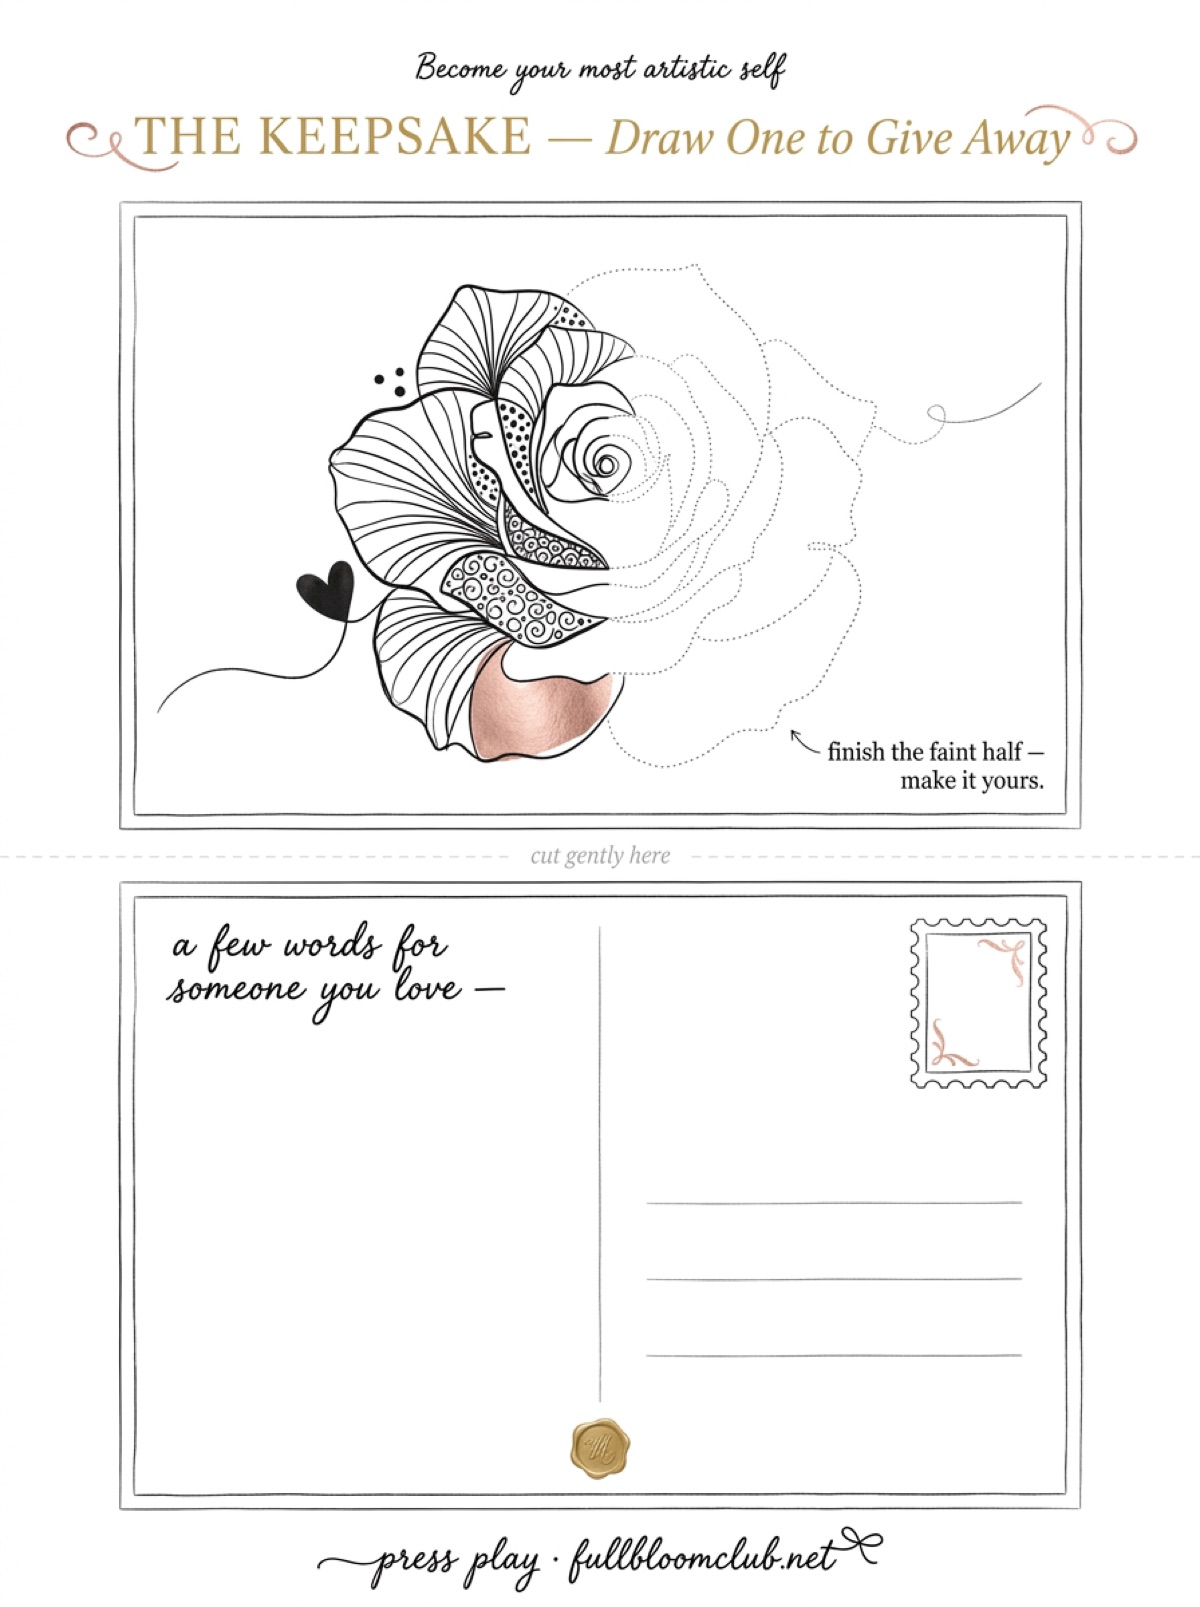
Pick one tonight and hold it against the gauge before you trace it. Each flower is built from simple shapes, then filled with pattern and one solid dark area. Punch the outline, fill the middle, leave the rest. I trace the lotus every time and I have stopped pretending otherwise.
Instant download · print as often as you like
The cloth keeps the whole evening on the side you were never looking at. Turn the frame over at the end and the hare is already there, facing the right way. Every loop of her was made backwards by somebody who could not see her arriving.
“It being considered indispensable that the left hand manipulating under the material must be visible to correctly form the design.”
The Dictionary of Needlework, 1882
Mirabelle wrote this. No training, strong opinions, many pens. Peer reviewed by a cat who sat on the frame, felt the loops, and filed no further comment.